Arròs a banda (fisherman’s rice)

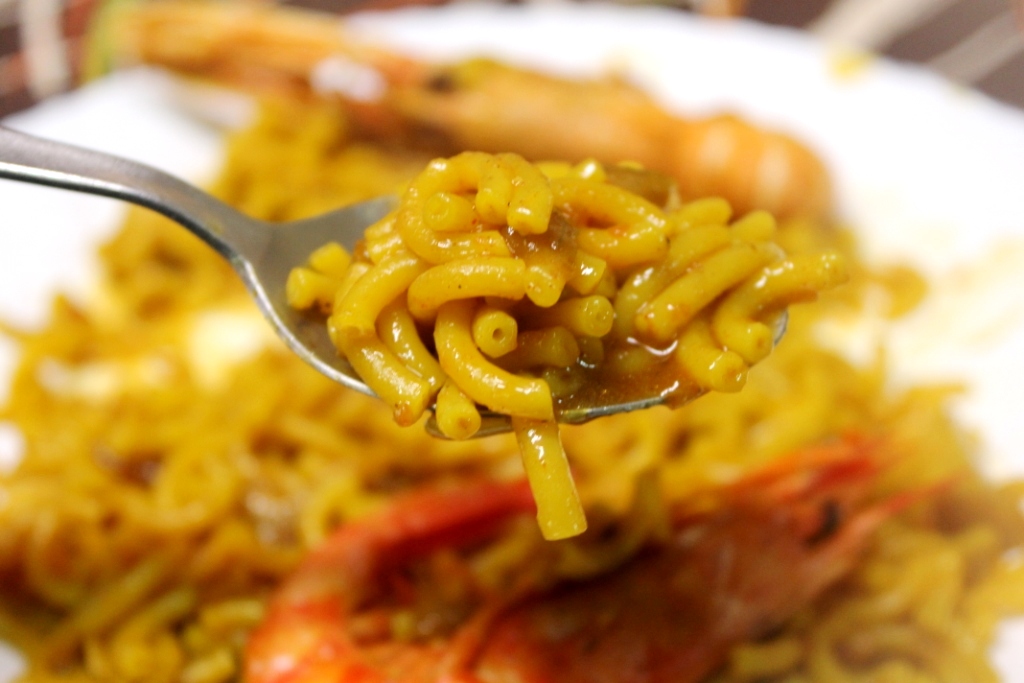
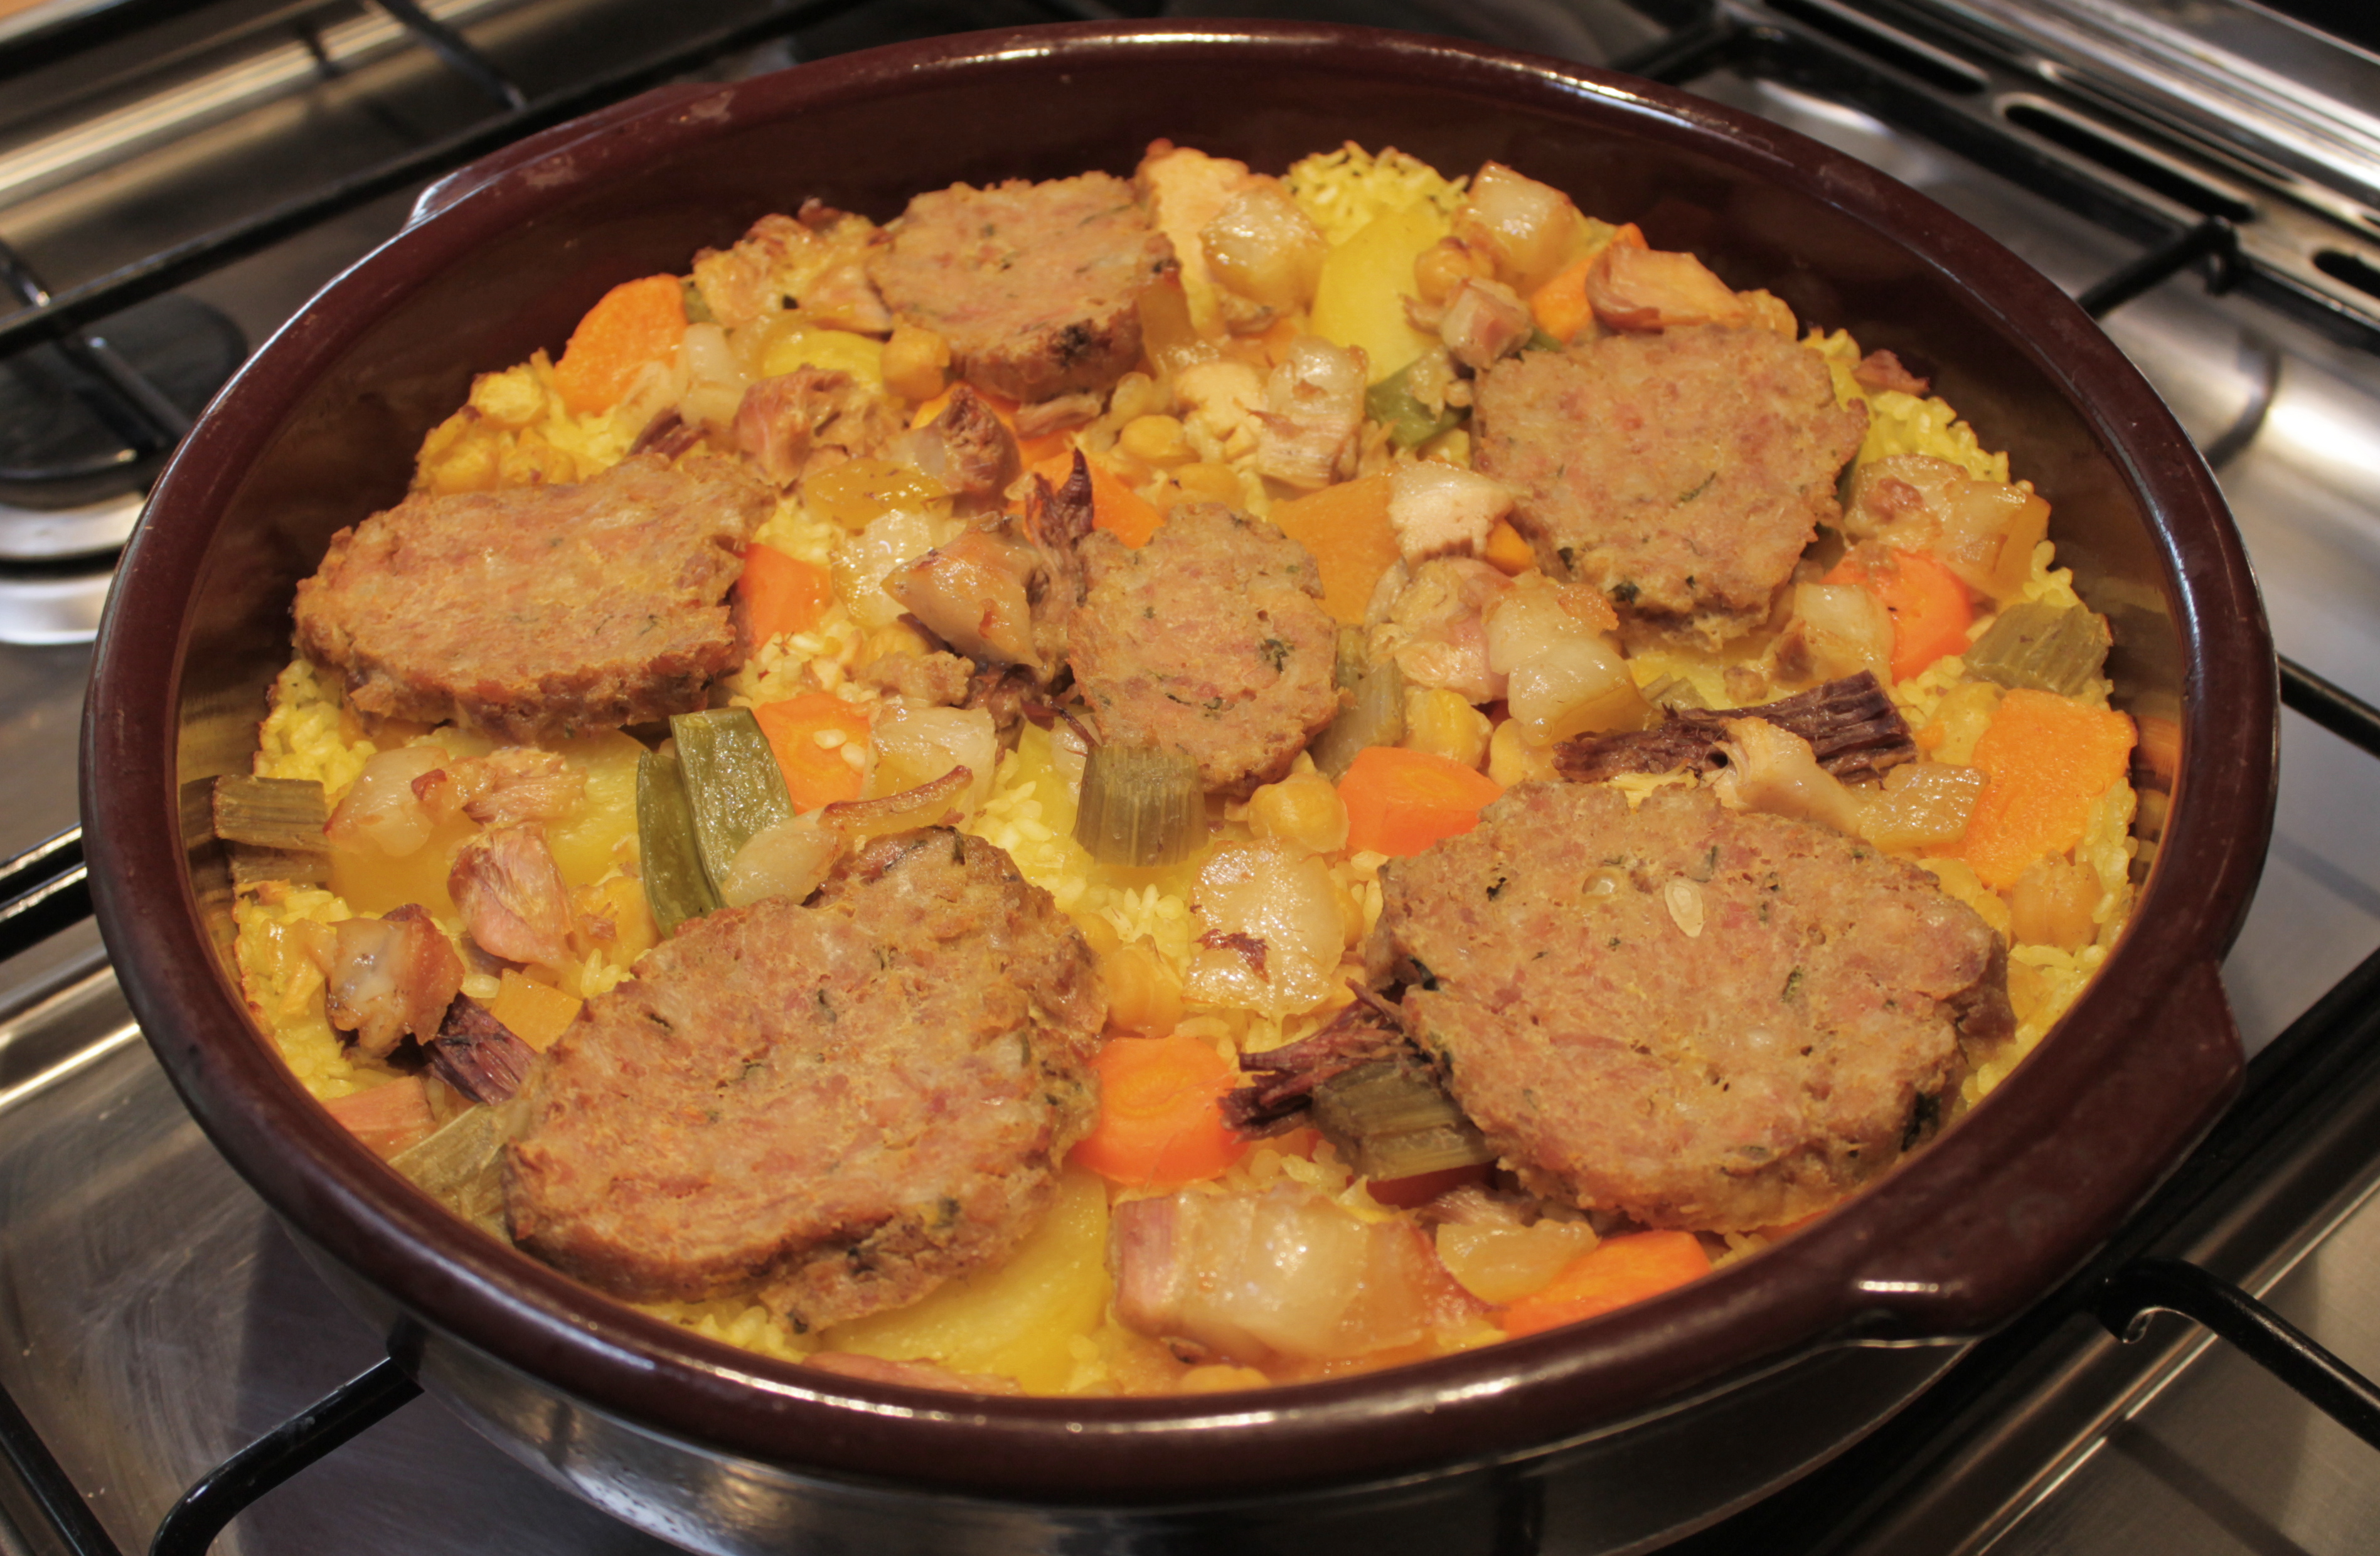
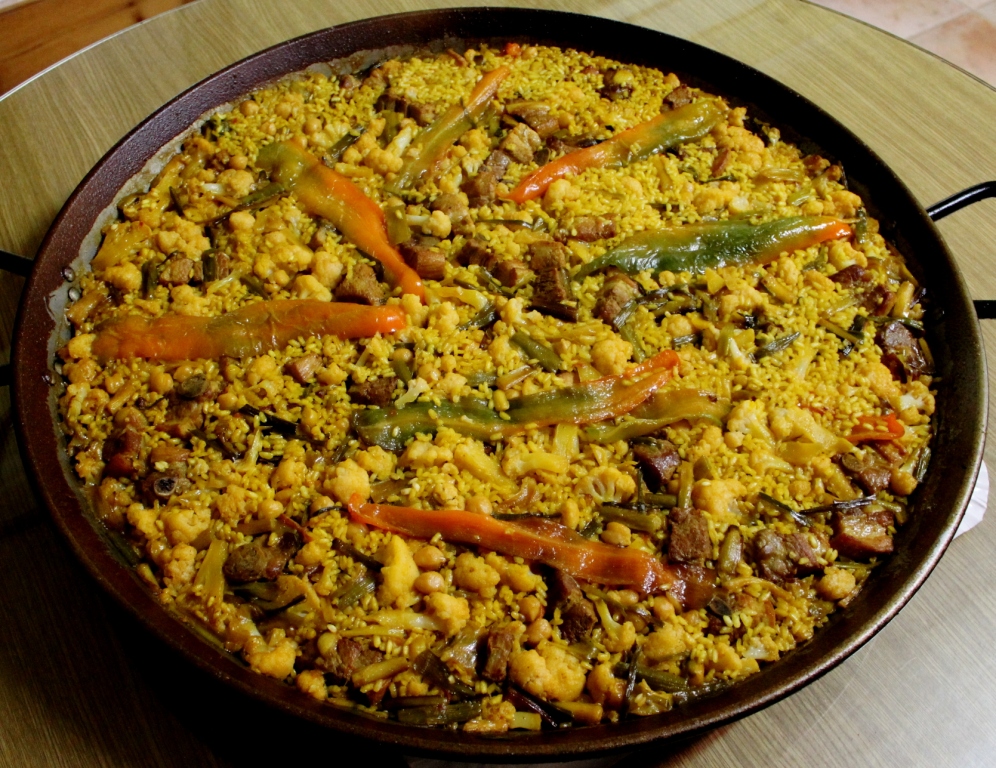
Another rice-based dish for feeding a crowd, this Arròs a banda is my father-in-law’s specialty and he cooked a beauty for us yesterday for the Good Friday family get-together.  There were 16 of us plus Luka, our dog, and not a grain was left over from 2 kilos of rice.

Traditionally this rice was cooked by fishermen who sold off their good stuff but kept some stock-worthy bits for themselves, to be boiled up with rice and scoffed with gusto.

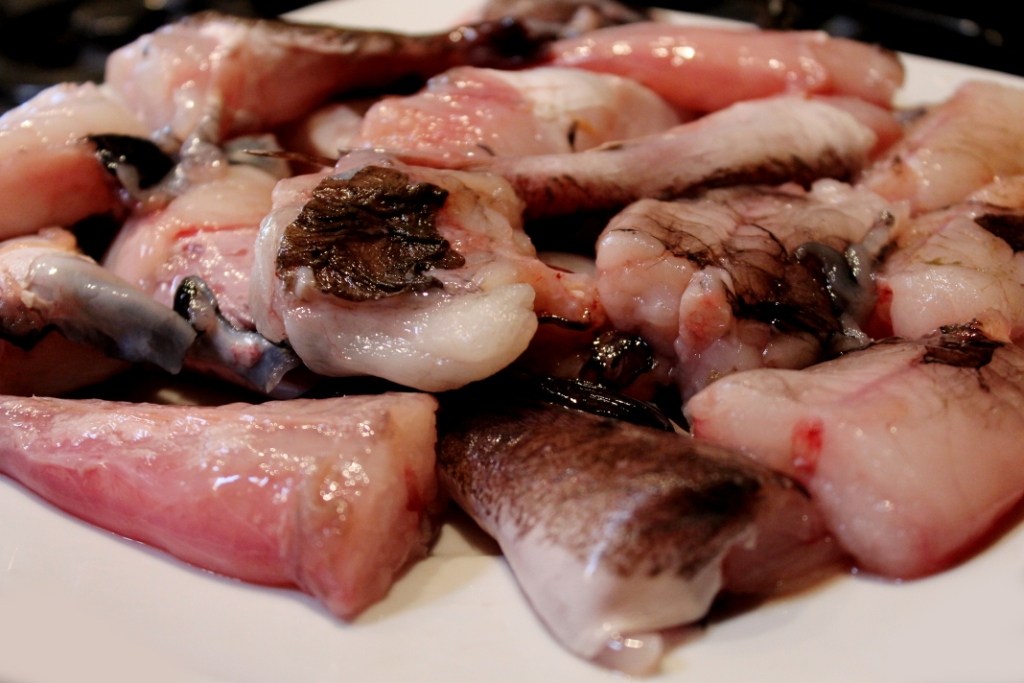
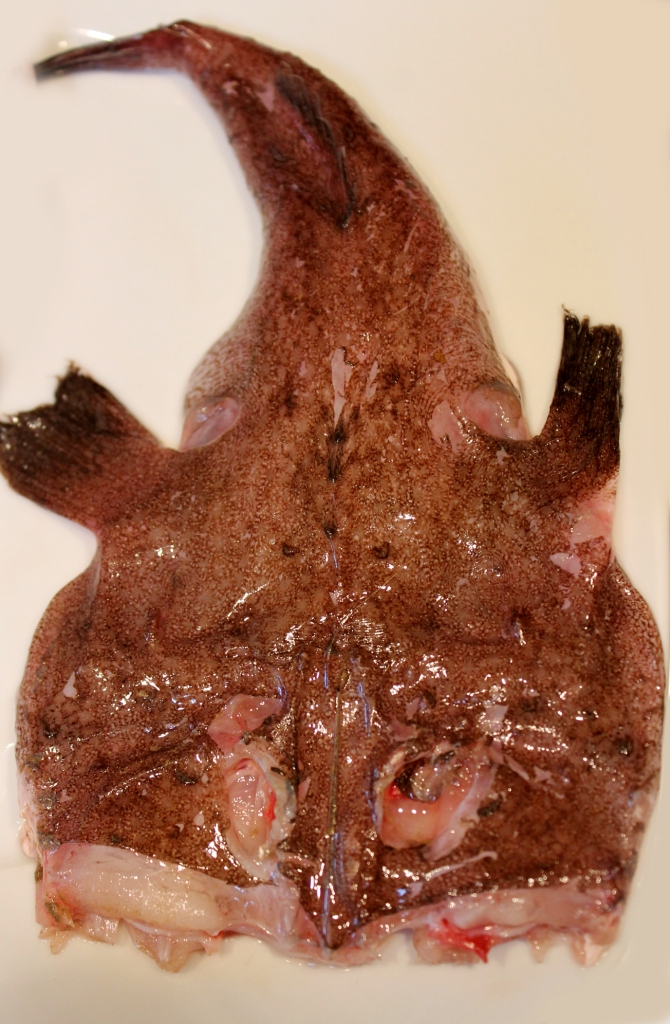
The stock used here was made with about a kilo of morralla which is bits of crab, tiddly little fish, fish heads (the monkfish heads left over from the Caldereta de Rap are particularly prized) and so on. We used just over 5 litres of it for the 2 kg of rice.

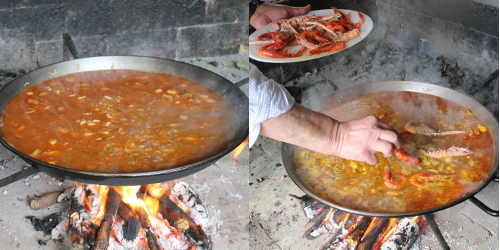
Funnily enough, although this rice is cooked in the same type of pan as the Paella, it is never eaten directly from the dish. Apparently, this is because if you leave seafood rice in the caldero it quickly takes on the metallic taste of the pan itself. So once cooked, everything gets piled up in the middle to keep it warm and served onto plates.

I am not putting quantities of prawns and mussels because you can put as many or as few as you like. I suggest that to avoid arguments, use at least one of everything per person!

What you need:fish
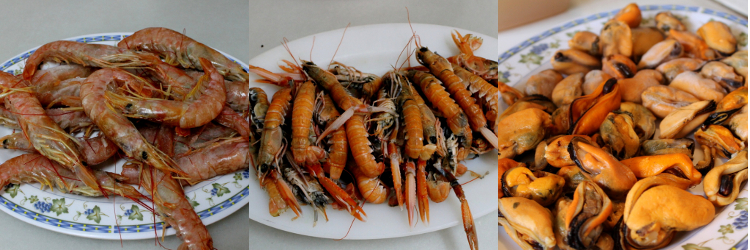
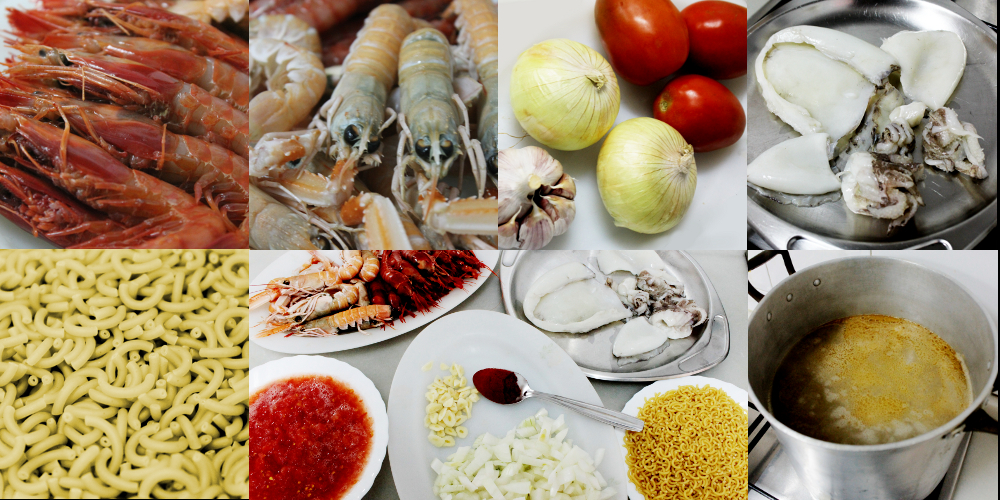
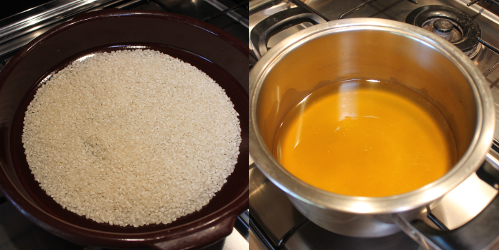
2 kg of (Spanish) rice
5-6 litres of good fish stock
Raw prawns and langoustines
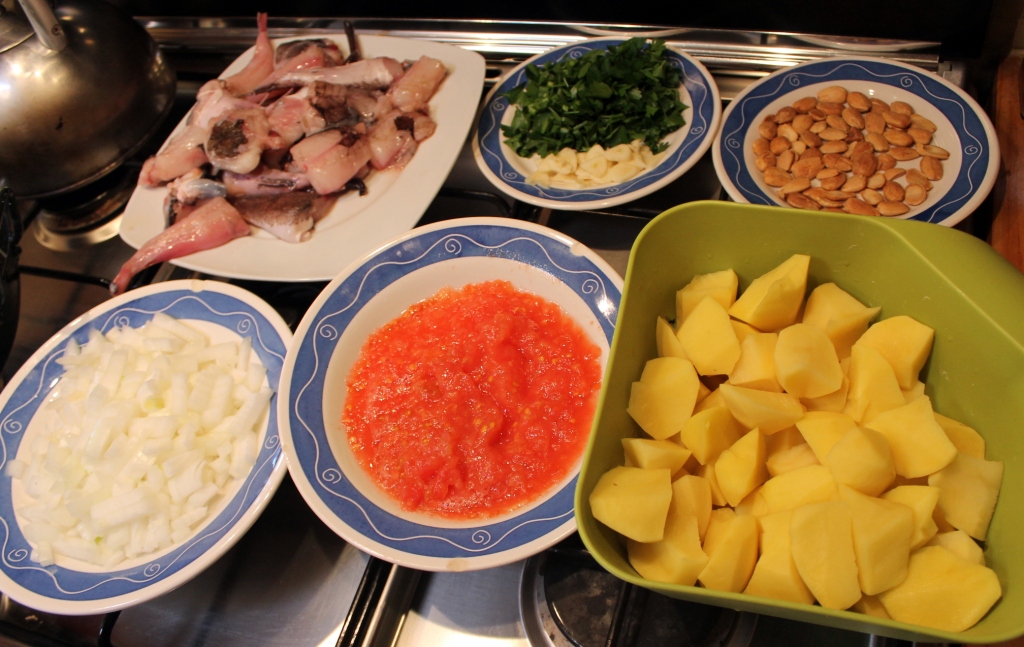
3 cleaned cuttlefish, chopped into small piecesgarliconiontom
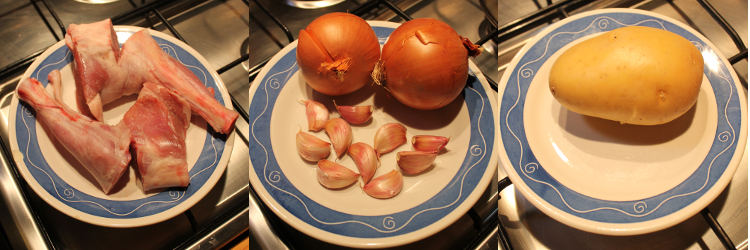
4 onions, finely chopped
1 whole head of garlic, finely sliced
8 pear tomatoes, grated
Mussels (optional)morestuff
Olive oil
Salt
Sweet paprika
Black pepper
Orange food colouring (or saffron)

What you do:cuttlefishandonion
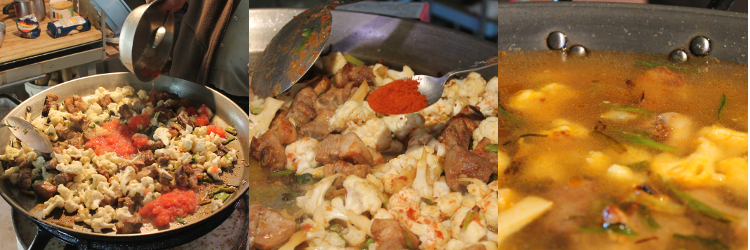
This recipe is very similar to the Fideuà, so if you have cooked that, you will have no trouble with this!  Oreto decided to gently fry 2 of the onions with the cuttlefish before putting it into the main dish – this is unusual, but it does save the crazy, violent, oil-flinging spit that cuttlefish always has as it gets dumped into a hot, open pan.

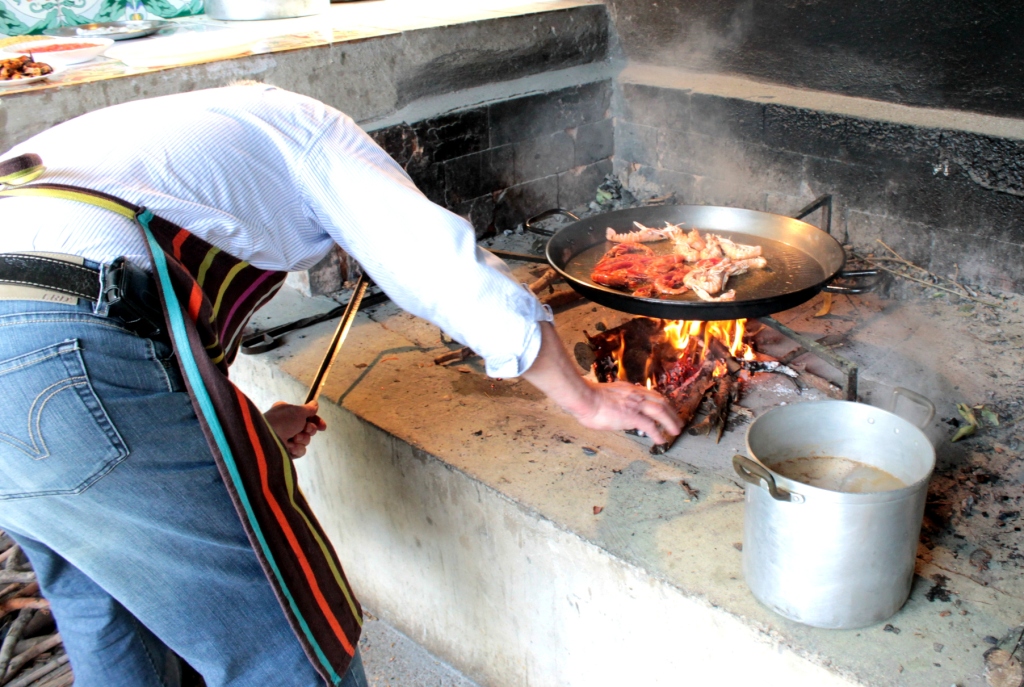
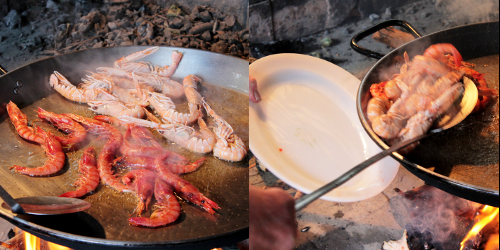
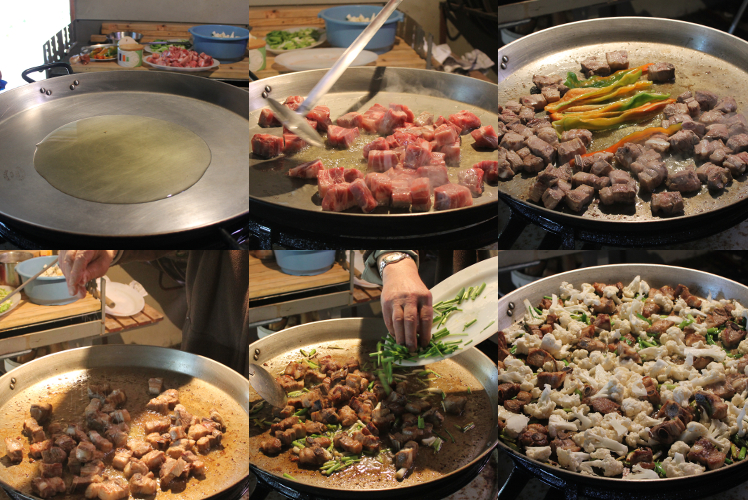
Once that is done, heat your pan and pour a good half litre of oil in to heat up. Eduardo always fries the prawns and langoustines first to flavour the oil. They only need five minutes or so, then you should take them out of the pan and reserve them for later.
123
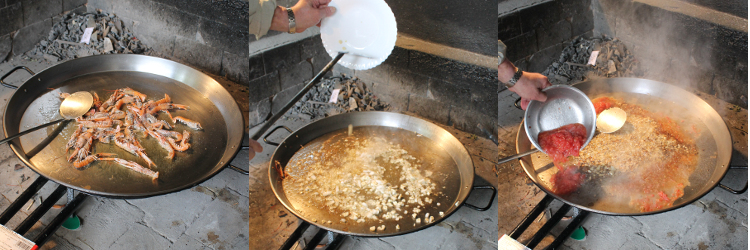
Onions and garlic get fried next, moving everything about so there is no burning. Once they have softened slightly, pour in the tomato and cook until some of the liquid has evaporated. 456
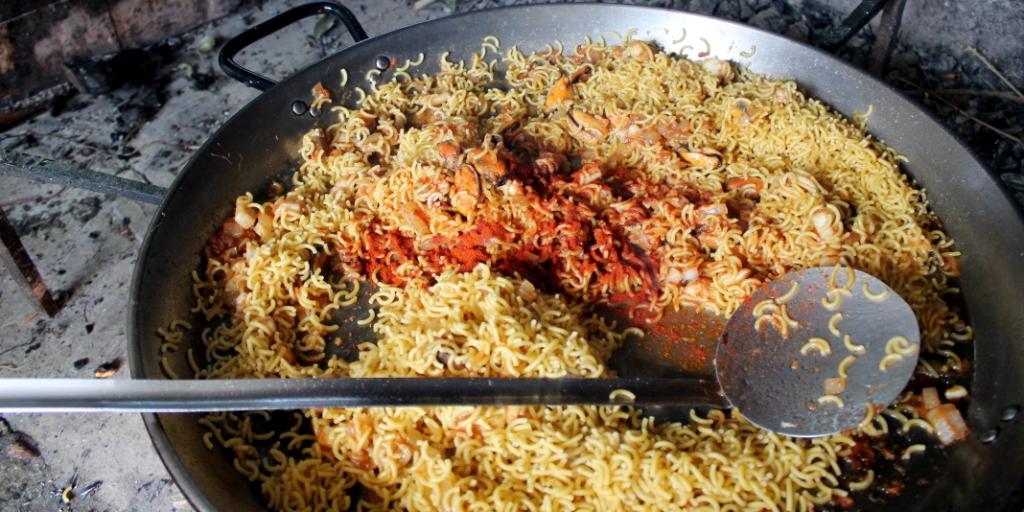
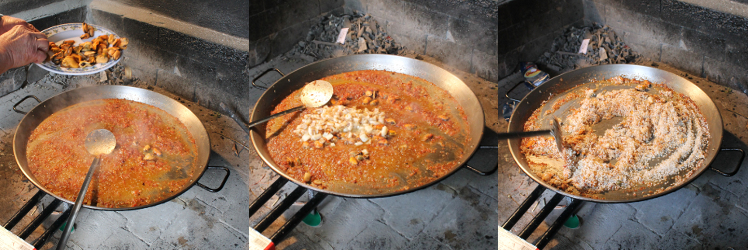
When it looks nicely done, stir in the mussels and the cuttlefish. Then it is time to fry the uncooked rice a little. This coats it with oil and helps stop any clumping. Give it about 5-6 minutes, moving it around constantly, so it doesn’t catch.789Just before you put the stock in, remember to add a good spoonful of sweet paprika to the pan. It is really important not to burn this spice – 30 seconds or so is enough, and then you need to pour your stock straight in.
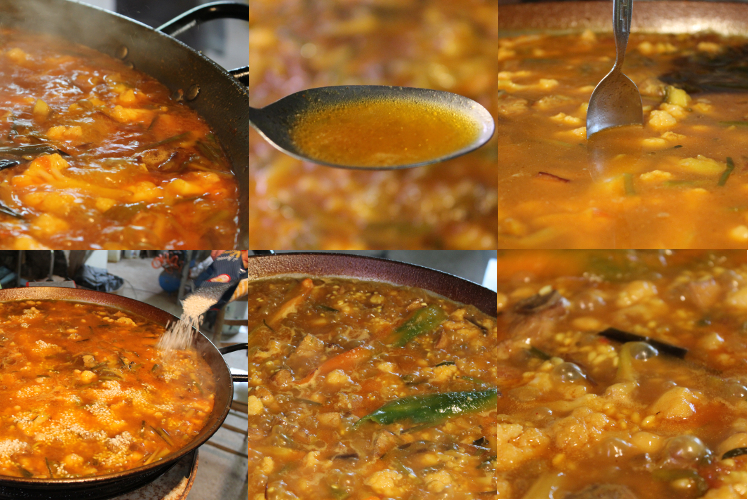
Check for salt, add the colouring or saffron, give everything a gentle push to evenly distribute the rice and bring to a boil.  When you have a lovely rolling boil going, place the prawns and langoustines on top and stand back.  You may need to add a tiny bit more stock if you see it evaporating faster than the rice is cooking, but other than that, leave it alone.101112Just before the stock has disappeared, get a healthy pinch of ground black pepper and sprinkle generously over the rice.spoonful

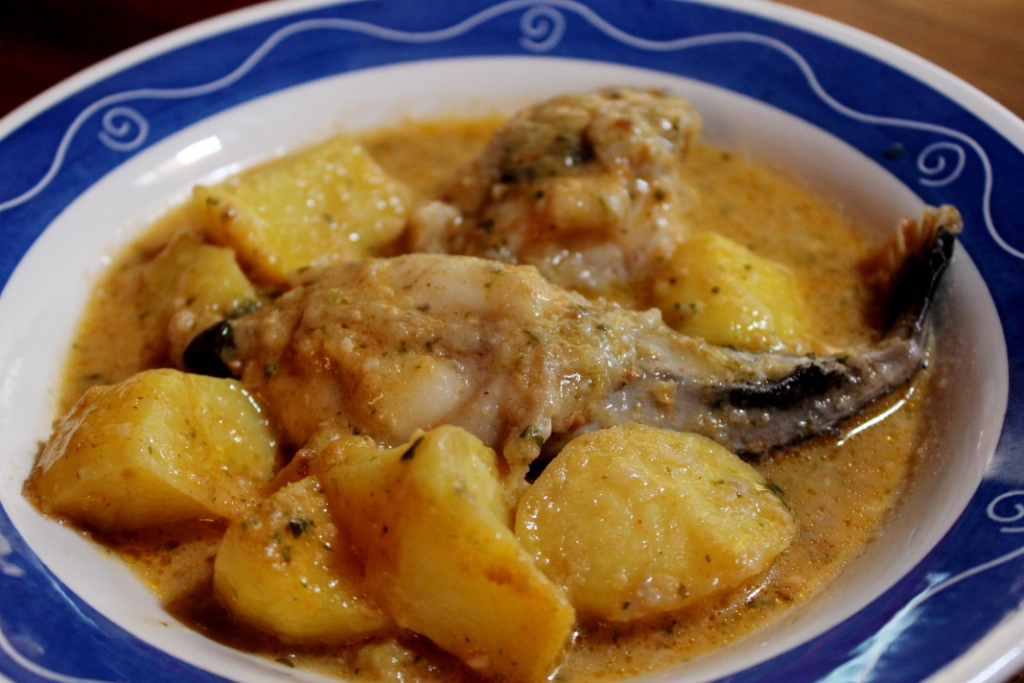
Serve with: allioli and bubbles

Caldereta de rap (monkfish stew)

This is one of Iaia’s signature dishes.  She tends to cook it for us on birthdays and we all love it, especially the thick sauce, which can be either scooped up with fresh bread or spooned up after mashing it into the potato chunks.

Fresh monkfish flesh is a lovely rosy pink. fishtails The frozen stuff does not taste the same, and Iaia refuses to use it. Try to buy smaller fish as their muscles are less fibrous and far more pleasant to eat. Leave some of the skin on if you don’t find it irksome, as this will act as a natural thickening agent for the sauce and enhance its sweet, fishy goodness.

Get the fishmonger to clean the fish but bring wholefishthem home with the heads on, which you can then scissor off and freeze for the best fish stock ever.  The cuts that go into the stew are the whole tail and the loin, both with the bone in.

Iaia swears by olive oil for just about everything and quite happily pours a good half litre into her pan to fry the potatoes. Once they are done, she siphons off about two-thirds of that oil and saves it for paella on Sundays.

What you need for 6:
About 850g fresh monkfish piecesingredients
1 kg potatoes
2 pear tomatoes
2 onions
3-5 cloves of garlic
small bunch of parsley
50g toasted almonds
½ litre of oil for frying (Iaia uses olive)
sweet paprika
2 small chillies, whole*
750 ml good fish stock
flour for dusting the fish
salt and pepper to taste
*optional and to be taken out before the whole dish becomes mouth-numbingly hot!

What you do:
Finely dice the onion, slice the garlic, grate the tomato and chop the parsley. All of these ingredients will end up being blended, so don’t be too fussy about perfect knife work.

Cut the potatoes into chunks. Iaia has a special technique – she stops each cut about ¾ of the way through and then breaks the piece off, saying that this will stop the potato chunks from breaking up as they cook. It seems to work!

Heat your olive oil in a deep pan and fry the potatoespotatoes in batches until golden, but not necessarily cooked through. Iaia says she uses so much oil because you have to have enough to cover the potatoes so that there is no chance of them getting crushed and deformed by constant turning and stirring.

Once the potatoes are done, remove two-thirds of the oil and reheat. Season your fish well with salt and pepper and dust with flour before laying it gently into the hot oil to fry.  You don’t need to cook the fish through; 2-3 minutes on each side is enough. When you remove the fish, place it directly into a wide, shallow, flameproof casserole dish, which is where you will cook and present the final dish.  Distribute the fried potatoes evenly over the fish pieces.

In the same oil, lightly fry the sliced garlic and then add tomatomixthe parsley and onion, cooking until the onion is softened. Pour in your grated tomato and fry until you notice the mix thickening slightly as the water from the tomatoes evaporates. If you are using chillies, settle them into the mix now, but take them out before you blend! Just before you take off the heat, pop the teaspoon of sweet paprika in and give it all a quick stir.

Pour the tomato and onion mixture into a blender along with the whole toasted almonds and pulse to a thick paste.  You can also do this with a stick blender, but avoid over-blending; texture is important here.

mixstockPour this picadillo, or flavour base, over the fish and then add just enough stock to cover everything. Check for salt – fish can be tricky and very easy to over-salt, so it’s best to add small amounts throughout the process than try to rectify with a great handful at the end.

Bring to a boil, turn down the heat and simmer gently for 20-30 minutes, adding stock if you see that it gets too dry, aim for a thick gravy-like consistency.

Like most stews, this one is even better the day after it’s cooked, but it will also benefit from standing for half an hour or so before serving.

finisheddish

Serve with: fresh bread and your best bubbly.

Fideuà

Last week Iaia turned 70, and not realising that her two boys had planned a surprise party for her, she got all the ingredients together for a celebratory fideuà.  Of course, there was no way we were going to let such deliciousness go to waste, so we had a second celebration today, and Eduardo, my father-in-law took the reins and talked me through the art of this fabulous dish.

The stock we used was homemade fish stock. Iaia often goes to the Friday market and buys a bag full of “stock stuff”, including monkfish bones, hake heads, little crabs and other odds and ends that are not otherwise sellable. She boils up a huge batch – maybe 10 or even 20 litres of stock – and freezes it in various-sized containers.

If you can be bothered, and if you can stand the stink, homemade stock is the best by far. Otherwise, buy the best quality fish stock you can find. Please, please don’t use stock cubes – they just don’t cut it for this sort of cooking, and I’m afraid Iaia would be horrified.

What you need for 9-10 people:
Uncooked langoustines and prawns (1 or 2 of each per person)
2 cleaned cuttlefish (or squid)ingredients
2 large onions
6 cloves of garlic
3 pear tomatoes
1 kg of fideos*
about 2½  litres of fish stock
250 ml of olive oil
1 tbsp sweet paprika
salt and pepper

*fideos are short lengths of thick, bucatini-like pasta with a hole running through them.  If you can’t find them, try breaking spaghetti or bucatini into 1-inch pieces and adjust the cooking time and amount of stock to suit the pasta you use.

What you do:
IMG_0239Eduardo cooks over an open fire, which is difficult and can be dangerous. If you can get hold of a paella gas ring and paella pan, then I would use them. Otherwise, if you scale down the recipe, you could probably do a pretty good version for 2 or 3 people in a large frying pan over a gas flame.

Slice the cloves of garlic and finely chop the onions. Grate the tomatoes and discard the skins.
Cut your cleaned cuttlefish into short strips and get
everything else assembled within easy reach before
you start cooking.

Pour the oil into your chosen frying prawnspan and heat well. Carefully place the langoustines into the hot oil and fry for a few minutes, turning them from time to time. Add the prawns and do the same, then haul all of the critters out and set them to one side.  This is not so much to cook the crustaceans as to perfume the oil, and it does wonders for the final
flavour of the dish.

Lower the heat a little and fry the garlic and IMG_0252onion for a couple of minutes, or until they soften slightly. Add the cuttlefish.  It’s a good idea to keep things moving throughout these early stages so that nothing catches and burns.  Eduardo also mentioned that when he buys fresh cuttlefish or squid, he scalds it and then lets it dry before frying it,
apparently this stops ittomato from spitting oil all over you, which is a good thing.  After about 5 minutes, the cuttlefish will be opaque, and the onion and garlic well-softened. It is time to add the tomato and your first seasoning of salt.  Keep pushing everything around the pan; burnt is bad.

(At this point, we had to take everything off the fire because my brother-in-law was late, and he was bringing the pasta. While we were waiting, we gave in to temptation and dunked some bread into the tomatoey base. It was superb.  Be tempted.)IMG_0260IMG_0264Once the fideos arrive, pour them all into the hot sauce, adding the paprika at the same time. Give them a thorough swirl to coat them with the flavoursome mix, and then pour your stock in.  It is a bit of a hit-or-miss calculation; experience seems to be the key. Eduardo used about two and a half litres today, and the pasta was perfect.

As the liquid comes to a boil, lay your stockinlangoustines and prawns over the top and check for salt. Allow to boil vigorously for the time stipulated on the packet – usually about 9 or 10 minutes. The liquid should have all but disappeared by then.

IMG_0279

We don’t eat this one from the communal dish but serve it on plates and sit at the table.  It’s important not to leave the pasta in the metal pan for too long, or it will take on a slightly metallic tang. If there is any leftover after your initial serving, pop it onto a large dish and bring it to the table – most people will want seconds anyway!IMG_0287

Serve with: bubbles or a cold, dry white

Oniony roast lamb

fireplaceNot only does our little fireplace keep us warm throughout winter, but it also furnishes us with an extra oven, which I use constantly in the cold months for pizzas, rice and meat dishes and roast veggies.  Today I cooked a Iaia-style leg of lamb with caramelised onions in it, and it behaved beautifully, staying really hot for the first half an hour or so and then gradually dropping down to about 160ºC by which time the lamb was perfect.
Our Iaia is not a fan of cold roast meat, but I am, so I cook a leg for 2 people to make sure there is plenty left over for salads and sandwiches.  And always use more onions and garlic than seems necessary, because they caramelise down to so little and taste so good that there is never enough!

What you need:lamb in pan
1 leg of lamb
6 onions
a head of garlic
a little white wine
a little olive oil
salt and pepper

What you do:
Heat your oven to about 210ºC. Roughly chop all of the onions into your baking dish. Break up the head of garlic into cloves without peeling them and chuck them in too. This way, the garlic cooks inside its jacket, and you get an amazingly fragrant paste to squish over your meat or mix into the juices for gravy deluxe.

Lay the leg of lamb on its oniony bed and season well with salt and pepper; add any herbs you fancy too.  Pour about ¾ glass of white wine into the tray and drizzle a little olive oil over the lamb – if your joint has been (sadly) deprived of its fat, add extra and massage into the meat.
Cover with foil and pop into the hot oven.  After half an hour, reduce the heat to about 170ºC (the exact temperature will depend on how fiercely your oven burns  – you want the lamb to cook for two hours without frazzling, so adjust as you see fit).

I take the foil off after the first hour and spoon some onion/wine/lamb juice over the meat.  If the onions appear to be either burning or sticking, it means you have not put in enough liquid, so add some quickly.

We like our lamb brown right to the bone, and the two-hour roasting time ensures both that and the scrummiest onions ever. They will be gloriously golden, the garlic softly squishy and the meat tender, with a darkened crusty exterior.

Leaving it to rest is always the best, but there are times (like today) when hunger gets the better of me, and it goes straight to the plate.

finished

Serve with: greens and a red

Creïlles amb alls tendres i ou fregit (egg and chips Iaia style)

Egg and chips. Quintessential Shirley-Valentine-English food, right? But wait! Iaia has her own version, which is so highly esteemed, that despite requiring the rapid frying of 30 eggs, it was actually the star of our Christmas Eve family dinner a few years back.

If you can’t find spring garlic, you can always use a couple of normal onions. You will, of course, be cooking a different dish – Patatas a lo Pobre (poor man’s potatoes). They are slightly sweeter than the garlic version but equally delicious.

These tasty totties are not meant to be crunchy, so they can be cooked in advance and reheated while you fry your egg(s) for supper.

What you need for 2:IMG_9888
a bunch of ajos tiernos (spring garlic)
(or 2 medium onions)
2-3 well-sized potatoes
salt
olive oil
an egg (or two) a piece
bread

What you do:
Chop the garlic into 2cm lengths and split the thicker white base in half if it is at all bulbous. Separate the thin green stalky bits as you will add them to the pan a little later to avoid burning.
Pour a generous few glugs of good olive oil into a frying pan and heat gently. Add the white stems of the garlic and fry, stirring to avoid sticking and keeping the heat moderate. You want to soften the vegetables but not add any colour.  After about 5 minutes, add the green stalks and a little salt.  Once the garlic has softened, and the oil has absorbed much of its fragrance, remove and set aside, but be sure to leave as much oil as possible in the pan as you do so.
Peel and roughly chop your potatoes into little bite-sized chunks.  Add a little more oil to the pan if you think you will need it, and heat well.  Pop the potatoes in and fry, moving them about to prevent sticking and promote even cooking.  Salt to taste. It will probably take about 10-12 minutes to cook them through. Once they are done, the garlic goes back in, and everything can be given a quick swirl to mix and mingle before taking off the heat.

Now, I assume I don’t need to tell you how to fry an egg, but I will say that frying requires oil. Without the oil, it is just heating, and I don’t know about you, but “here, have a heated egg with your chips” doesn’t appeal to me at all. We always use olive oil. If you want that lovely, brown, lacey edge on your egg, make sure your oil is hot before you crack!IMG_9892

Serve with: a generous sprinkling of black pepper and, as the oil that will inevitably find its way onto your plate has extremely high oop-value, go for a carb-overload with lovely fresh bread.

Putxero Day 2 – arros al forn (oven-baked rice)

Although this rice uses exactly the same ingredients as yesterday, it has it’s own distinct character because everything dries out a little more in the oven and the flavours intensify.

First off then, pop your oven on to about 180ºC. It needs to be hot by the time you have the rice ready to go in so the stock doesn’t get a chance to go off the boil.

Because we want dry (but not horribly dried out,) rice today, we have to measure the next bit pretty carefully. If you are cooking this in a ceramic or terracotta dish, the stock-to-rice ratio is exactly 2:1. If you use a metal baking dish, you will need a little more stock, and if you cook wholemeal rice, you should increase it to 3:1.  I used one and a half glasses of rice and 3 glasses of stock today. riceandstockIt is also really important to heat your stock to boiling before pouring it over the rice; otherwise, it will all take a good while to start cooking, and things will go all gluggy. Best to get your stock in a pan and on the heat while you deal with the rice and other bits.

Pour your rice into the base of a large, shallow terracotta dish (or a baking tray) and cut however much leftover meat, veg, chickpeas and pork fat you want to decorate your rice with and into bite-sized pieces, slicing the meatball into large rounds. ingredients

Sprinkle them about however you like, but make sure that the meatball slices and the dices of fat are on top – they will brown and melt beautifully and are the bits everyone always fights over.IMG_9784Once you have everything ready, season to taste and pour your boiling stock over the top. Into the oven for 30 or 40 minutes – until the stock has been absorbed by the rice and the top is looking goldenly fabulous.IMG_9789

Serve onto plates or, if you are friendly enough with your dining companion, eat it straight from the dish, following the paella etiquette rules.

Potage (thick vegetable and chickpea soup)

One of Iaia’s great winter staples, this thick vegetable soup can take just about anything you throw at it. She often puts small pieces of diced Serrano ham, or whichever vegetable looks good at the greengrocers.  You can use vegetable stock for a vegetarian soup, but I happened to have chicken stock in the freezer so this recipe was made with that.

Chickpeas are somewhat contentious in our household. Oscar loves them but I am a little less enamoured and tend to add far fewer than he would like (occasionally omitting them altogether, by accident, of course). However, they really do make this soup properly filling and really satisfying.  We buy dried chickpeas and soak them overnight in a heap of water before adding them to any slow-cooked stew or soup for a full couple of hours at least. If you are using the canned version, pop them in at the same time as the haricot beans to heat through and absorb some of the flavours. As with most stew-like dishes, this one improves after sitting quietly overnight.

ingredients

What you need for four people:
1 large onion
3 cloves of garlic
2 large (3 small) pear tomatoes
2 carrots
1 stick of cardoon if you can find it
4 medium young artichokes
250g chickpeas (pre-soak if dried)
1 small jar of white haricot beans
600ml or so of good stock
2 hard boiled eggs
salt
olive oil

IMG_9694

What you do:
I prefer to do all the washing, chopping and grating before turning any heat on as it saves me the frustration of watching my base veggies burn because I can’t peel or chop something quickly enough (and yes, I learnt this the hard way). So, finely chop your onion and garlic, then chop the carrot and cardoon into smallish pieces and wash your spinach thoroughly. Now grate the tomatoes, discarding the skin, and last of all, peel the tough outer leaves off the artichokes, slice off the base and the leaf tips so that only tender pale artichoke, which you will cut into eighths, remains.
When everything is ready, put a generous tablespoon of good olive oil into a large, heavy-based saucepan and gently fry the onion and garlic. Once they have softened, add the tomato and stir for a couple of minutes so that it gets a bit of a fry, too – this brings out a deeper flavour than just letting it boil along with everything else.  In go the carrots, cardoon and artichoke with a stir. If you are using pre-soaked chickpeas, pop them in now too.
The amount of stock you use will depend on how large your vegetables are. I used about 600ml for this particular potage. The idea is to just cover everything so that you end up with a really thick broth.  Once you have put the liquid in, you can add some salt to taste and then you have to turn everything down to the lowest heat possible and let it simmer very gently for at least 2 hours. Iaia says, “fes-ho poquet a poquet” which means “do it little by little”.
Towards the end of the cooking time, add the spinach, beans and canned chickpeas, which will be happiest (and tastiest) with about 20 minutes of gentle simmering.  Just before serving, roughly chop your two boiled eggs and let them sink into what should be a very good-looking pan of potage.
Serve with: bread and red

Coca de carabassa de La Borrassa (pumpkin sponge)

Pumpkin is not considered a savoury ingredient here and is never served as such. More often than not, the sweet round fruit is cut in half and roasted in a moderate oven for a couple of hours until caramelly and soft.  Slices are then taken as if from a pie and eaten with a spoon for dessert. The cooked flesh is also incorporated into many typical sweets such as buñuelos (fried doughnut-style balls), or sponge cake.
This recipe comes from a neighbour of Iaia’s who is commonly referred to as La Borrassa. The intricate system of hereditary nicknaming that is an integral part of the small rural township here in Valencia never ceases to amaze (and amuse) me. This particular woman’s moniker comes from the fact that her surname is Borras. The “a” at the end denotes the fact that she is a female Borras.  But it is not always that simple. I have heard conversations that (loosely translated) run something like this:

“Did you hear what happened to Rosa?”
“Which Rosa?”
“Um, you know Carmen the Duck (daughter of Pedro the Drake), whose sister married Joe the Monkey (son of John the Monkey)?”
“Do you mean the Duck who used to live next door to Harry Bread and Oil’s mum?”
“Yes, that’s her. Well, The Duck’s cousin, Rita the Crying Woman, is Rosa’s older sister.”
“Ah. So Rosa is the younger Crying Woman! Now I know who you mean. Her husband is Man’s Head the plumber!”…

 Yes, well, in any case, here is the recipe for La Borrassa’s Pumpkin Sponge. Quantities are for a 37 x 25 cm baking tray, so fiddle them to suit your tin.

What you need:ingredients
250g roast pumpkin flesh
500g sugar
5 eggs, separated
400g plain flour
100ml sunflower oil
100ml milk
zest of 1 lemon
2 sachets (32g) baking powder

What you do:
Pre-heat your oven to 180ºC and line your baking tray/cake tin with parchment.  Mix the egg yolks and sugar together, then mash in the pumpkin. I use a fork and stop when I see the sugar starting to liquefy. Whisk in the oil and milk, then gradually sift in the flour and baking powder, mixing thoroughly between each addition. Stir in your lemon zest, then whip up your egg whites until soft peaks form before folding them into the mix too. Don’t over-mix at this stage, or you will squash all the air out, and your cake will not be as springy and spongy as it should.

Pour the batter into your prepared tin and cook for at least half an hour, testing with a skewer once this time is up. Don’t be tempted to open the oven before the 30-minute mark or your sponge will collapse. Allow to cool in the tin…if you can bear the wait.

IMG_9417

Iaia’s braised lamb shanks

I’ve got exams starting next Monday, so this week’s cooking is all about minimum time investment for maximum flavour.  Iaia’s lamb shanks fit the bill perfectly and are what we had for lunch today. It’s true, they do require slow cooking, but you can pop them on the stove and forget about them for a couple of hours while you do something else (like study). Once cooked, they can be left off the heat in the pan to develop their flavour for hours, or even overnight. A quick reheat is all that’s needed before serving.

What you need for two people:
two lamb shanksingredients (get the butcher to nick them like these ones here, so they cook evenly)
a head of garlic
2 well-sized onions
a large potato
salt, pepper and any herbs you fancy
a generous half glass of white wine
the same of water
a couple of tbsp of olive oil
a spoonful or so of flour

What you do:
Season your flour generously with salt and pepper, then lightly dust your lamb with the mixture. Heat the oil in a heavy-based (preferably oven-proof) saucepan or casserole dish and brown the lamb well.
While the meat is colouring, take the head of garlic apart but don’t peel the cloves, they will steam into a lovely mild pulp in their pink jackets. Peel the onions and cut them in half, then into slices (not too thinly, or they’ll burn).
When you think the meat is well browned, remove it from the pan and set aside while you toss the onion and garlic in the hot oil to soften without colouring. You will need to stir things about because you don’t want the onion colouring or burning. Adding a little salt to the onion will encourage it to release water and help avoid burning too.browningandbeddingPour the wine and water into the pan, settle the lamb shanks comfortably into their oniony bed, cover tightly, turn the heat down and leave everything to simmer quietly for a couple of hours. You may want to check the liquid levels every now and then, depending on how well your saucepan seals.
After about an hour and a half, peel and cut your potato into smallish pieces, dropping them around the lamb. Cover and simmer again until the totties are cooked through. Then switch everything off until about 20 minutes before you want to eat (or continue straight onto the next step).finishingWhile you are steaming any accompanying vegetables, finish the lamb off by putting it under the grill, making sure it isn’t too close to the heat source. This will brown the potatoes and give your melting meat a nice dark crusty exterior.

IMG_9379

Serve with: steamed greens

Paella

Ask anyone about Spanish food and it is pretty likely they will wax lyrical about paella.  It is a fantastic dish and even though we eat it just about every Sunday, I never grow tired of it.  Seasonal and regional varieties abound. Near the coast it is usually cooked with seafood but we live inland, so our typical ingredients include chicken, rabbit and locally produced vegetables.  In January, cauliflower is at its best, so we do a cauliflower, spring garlic and pork version. In March the broad beans are just tender little blips and mix beautifully with artichokes for our favourite spring paella.

The way paella is cooked varies slightly from town to Iaia's selection of paella panstown – even from house to house. For example, just a kilometre away from where we live, they fry the rice before adding the stock, something we never do.  The one thing that everyone agrees on is that you need a good, heavy caldero or paella dish like the ones pictured here, and plenty of experience to be able to produce a perfect paella, especially if you are cooking it over an open fire.
Some say that it is impossible to make a decent paella anywhere but here in Valencia (the local giant paella makers Galbis go so far as to take everything – even their own water – with them wherever they go to try to emulate the local flavour as closely as possible), but you can have a pretty good go and with a bit of practice will be enjoying a truly fabulous rice dish, even if it doesn’t taste exactly the same as what we have here.
Cooking over an open fire can be really IMG_1880tricky, even for seasoned paella cooks, so see if you can get your hands on one of these paella rings – they plug into a gas bottle and give really good control over the flames. For two people you might get away with cooking the paella in a large frying pan, but ideally you need a caldero.
Although serving paella on plates is perfectly acceptable it is more authentic to gather your chairs around and eat directly from the caldero. It’s fun as long as everyone follows the basic paella-eating rules:
Mentally divide the paella into pie-slices for each person. You are not allowed to eat from anyone else’s slice or break the barrier between your slice and the person next to you without permission. Interestingly, the size of this barrier is a pretty accurate indication of the relationship between neighbouring eaters. The smaller it is, the closer they are.
If there is something you don’t want in your slice, you can flick it gently into the centre with the handle end of your spoon (never the bowl).  Start eating from the edge and work your way inwards dragging the rice towards the rim with your spoon and squashing the spoonful flat against the inner wall of the pan to avoid dropping grains of rice all over the place.

Paella with cauliflower, pork and ajos tiernos

Oscar’s uncle Rafa is usually in charge of cooking Sunday lunch but today he was otherwise engaged so my father-in-law Eduardo took up the long-handled spoon.  It was unbelievably windy, so an open fire was out of the question. We huddled in the shed and cooked the paella over a gas flame. Not exactly picturesque but unbelievably good all the same! We used a kilo and a quarter of rice, enough for about 12-15 people. As Eduardo points out, the amount you cook depends on who is eating, how much people nibble beforehand and how much you want left over for later.  It is almost impossible to give accurate measurements for the ingredients, I have recorded what we used today but every paella will be slightly different.  The amount water is the hardest thing to get right and trial and error is an unavoidable part of becoming a proficient paella chef!
Cauliflower is at its best right now and the normal accompanying vegetable is what we call ajos tiernos. They are sort of like spring onions but in garlic. I have no idea if these are available outside Spain – spring onions and normal garlic are NOT the same and would not work here – best to just leave them out if you can’t find them.

What you need:

200ml olive oilingredients
1½kg  pork rib in bite-sized pieces
a bunch of ajos tiernos cut into 3cm lengths*
a medium-sized cauliflower broken into florets
4 pear tomatoes, grated (discard skin)
2 capsicums torn into pieces
1¼ kg rice
250g chickpeas, soaked and pre-boiled
sweet paprika
orange food colouring
salt
*you will have to add the pieces according to size so that the smaller pieces don’t burn. First the thickest white parts, then the thinner white parts and finally the green sections.


What you do:
Set the caldero on the gas rings and make sure it is level. Pour in the oil and heat.  Add pork and brown well. Lightly fry the capsicum until it softens slightly then remove and set aside. Season the meat. Add the thickest pieces of the ajos tiernos and fry for about 30 seconds. Follow with the smaller sections and then about 30 seconds later the thin green parts. Pop the cauliflower in and stir well to coat everything with a little oil. A long handled spoon or a pair of long tongs is essential for this if you are using a large caldero. fryingWhen everything is sizzling away nicely, add the tomato to deglaze the pan. Fry slightly then add a spoonful of sweet paprika. Stir and cook for about half a minute, taking care not to burn the spice. Now it’s time to put the first lot of water in. Pour it in until it reaches the screws on the side of the caldero. I think we put in about 2½ litres today, adding a little later after the first boil.  frying&waterIt’s a good idea to keep seasoning as you go – Eduardo says “better to add a little salt five times than a lot twice”. Check everything is comfortably under water and bring to the boil. This initial cooking period will soften the vegetables and tenderise the meat. It also gives the cook a chance to grab a beer and some olives or cheese!
Things should be looking pretty well cooked after 15 minutes or so boiling. That means it is time to get ready to add the rice. Top the water up to the screws again (when you stand a spoon up in the middle of the pan, the liquid should reach about half-way up the bowl – see the photo) and season with a little more salt. Add your food colouring, pop the chick peas in and give everything a final, gentle stir. Once you put the rice in you can just gently poke things into place, but any major spoon action is forbidden. Gently lay your fried capsicum pieces over the top of everything and then get the water boiling nicely again. Pour in the rice, making sure it is spread evenly around the pan.  Use a spoon to push and poke any visible grains under the water and off the vegetables but don’t stir! stockRice needs to dance as it cooks so that it doesn’t go all gluggy and sticky. Bring the water up to a steady, rolling boil. Try the stock for salt remembering that the flavours will become more concentrated as all the water evaporates.
The rice we use here takes about 20 minutes to cook through by which time all the liquid should have disappeared. You can’t add water after it’s started cooking so you need to control the flames carefully. If it looks as though there is too much water, turn up the heat. Too little water and you will need to turn the flames right down and, if necessary, cover everything with some tinfoil to let the steam help the rice cook through. If things go to plan, your rice should absorb all of the liquid and form a crusty, caramelised layer underneath. This is called socarrat and everyone will want some.
Once all the water has evaporated and your rice is cooked, take the pan off the heat and, if you can bear to wait, leave it to cool for about 10 minutes before serving onto plates or, Valencian style, eating directly from the pan. This last option requires special knowledge of paella-eating etiquette (see above).

paella

 Serve with: wine in winter, beer or icy sangría in summer…