Spanish Omelette (aka potato omelette)

Spanish Omelette in Spain means potato omelette, with or without onion. Everyone has their own secrets for making one of the most fantastic omelettes ever, and discussions can get quite heated when it comes to whose is the best! Iaia always uses onion and can turn out a perfect tortilla with her eyes closed. I still need to keep mine open, especially with the flipping.
This dish is incredibly versatile as it can be consumed hot or cold, served as an appetiser, a main meal, a snack, in a roll, on a plate, in bite-sized squares on toothpicks, with tomato, with mayonnaise, with salad, at a picnic, a dinner party, as part of a buffet…need I go on?
The recipe here is for a large dinner-plate-sized omelette which will provide a good slice for 6-8 people. I used a stainless steel frying pan as it’s the only large pan I have, but I highly recommend using a non-stick pan instead.

What you need:ingredients
3 potatoes
1 onion
6 eggs
olive oil
salt
a non-stick frying pan

What you do:
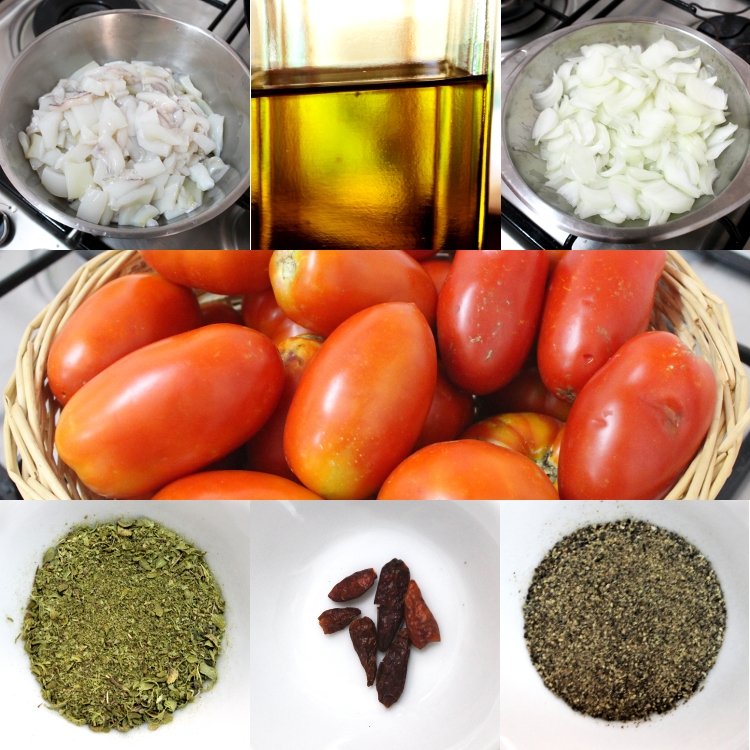
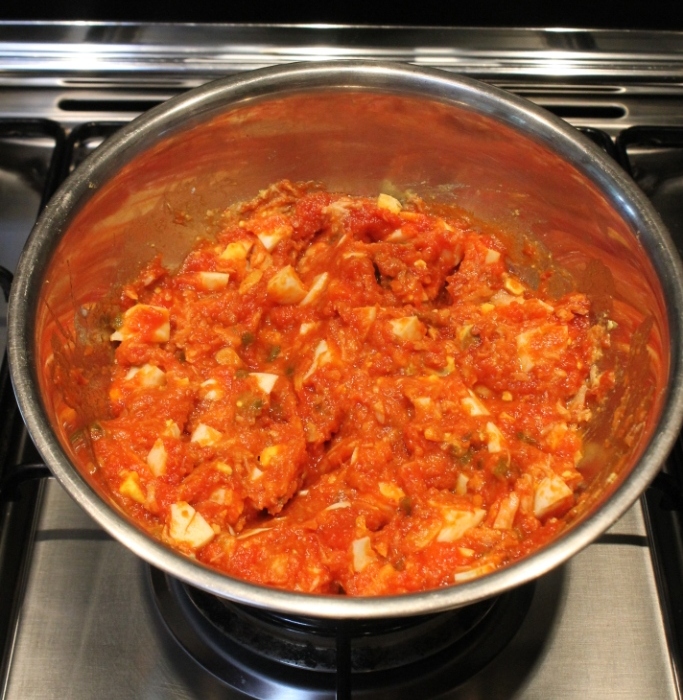
Chop the potato and onion into chunky pieces, as you see above. Heat a generous amount of olive oil so that nothing sticks or burns (you can always drain any excess off before adding the eggs), and gently fry the onions for a minute or two before adding the potatoes. Iaia insists on covering the potatoes as they cook so that their edges become sort of fuzzy instead of sharp. This helps the egg stick to the totties later and gives you a much more attractive finish without any air holes between the potato and egg.process1
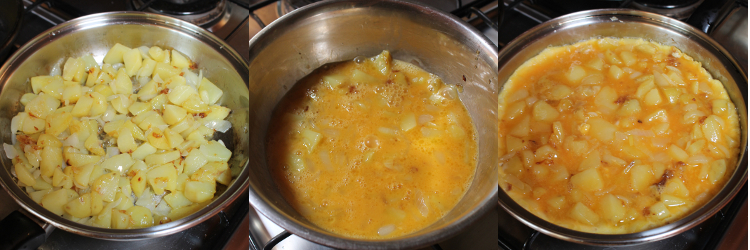
Beat your eggs in a large bowl and add a good pinch of salt. Once the vegetables are cooked, but not falling to pieces, use a slotted spoon to transfer them to the egg bowl.  Drain any excess oil from the frying pan, but remember you will need a healthy coating to stop any sticking (even in a non-stick pan). Once the pan is well heated again, pour the whole egg and vegetable mix in and move it gently around (without disturbing the edges) so that the omelette cooks evenly, but take care not to turn it into scrambled egg. You can cover a very thick omelette to help with the cooking but don’t walk away!
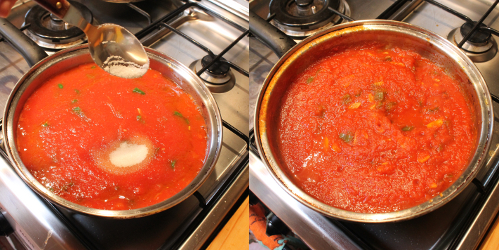
After a little while, you will have a browned bottom and edge, and curd-like centre. It is time to flip (for photos of this see the Spinach Omelette recipe).  Take your pan off the heat and cover it with a plate. Wrap a tea towel over the top and base of the pan to avoid burning yourself, and grip firmly from either side. Flip with conviction, so the omelette flops out onto your plate in one piece. Put your pan back on the heat and slide your now raw-side-down omelette back into the pan to finish cooking. I like to use a spatula to tuck the edges under a little because it gives a lovely rounded edge; this is especially important if you are cooking a larger omelette.
The trick is now to cook the omelette to the ideal point – neither runny nor rubbery. Practice will show you what it feels like to the touch when it is ready.  Turn out onto a plate and allow to cool (or not!) before eating.finished

Cuttlefish, tomato and “pebrella”

Fresh cuttlefish pre-cleaning

One of Oscar’s favourite mixes for stuffing into a brunch roll or ooping onto great crusty lumps of bread is this cuttlefish, tomato and pebrella mix.  This last is a herb found locally. Its grown-up name is Thymus Piperella, and if you search online, you might find a supplier – it has a really distinctive flavour, and although oregano could be used as an alternative, it hasn’t got the same special kick.
For the fishy part, I dragged Iaia along to the Valencia markets yesterday to help me choose the best critters and then she walked me through the recipe step by step. It’s best to buy fresh (oh-so-ugly) cuttlefish and get your friendly fishmonger to do all the cleaning for you. You will probably still have to cut off the tough wings and pull out a beak or two, but the worst part will have been dealt with by abler hands (than mine, at least). Oh, and stand back when you put the cuttlefish into the pan – it spits!

What you need:ingredients
3 medium-sized cuttlefish
a healthy kilo of pear tomatoes
2 onions
olive oil
black pepper
pebrella (thymus piperella)
dried chillies

What you do:
Chop the onions and cuttlefish into smallish pieces. Grate the tomato and put some oil in a deep pan to heat.  The cuttlefish is the first to go in as it takes quite a while to cook.  It spits horribly when it hits the oil, so be really careful!  Let it sizzle gently for about 15 minutes before adding the onion to fry and soften for another 10 minutes or so. processPour in the tomato, add some salt, the herbs and the chillies (Iaia uses a tea strainer to be able to fish them out before it gets too hot) and let everything bubble away quietly for about an hour, or until you see the tomato losing most of its wateriness and becoming thick – like a really great pasta sauce. Remember to test for flavour and remove the chillies when you notice a bit of heat.

Take off the heat and allow it to cool completely before serving. We like to leave it overnight and put spoonfuls into a crusty roll for brunch.

finishedServe with: Cold white wine and lots of bread.

Ensaladilla Rusa (a not-altogether-Russian potato salad)

About 10 years ago, a Russian girl called Lana came to stay with someone in the family as part of an exchange programme. My mother-in-law proudly served up a huge batch of Russian Salad to make sure Lana felt at home and was amazed when told that it was about as un-Russian as a salad could get! It seems that our Lana had never eaten at the Hermitage in Moscow circa 1860, where apparently this style of salad was first created by head chef Lucien Olivier. Now Ensaladilla Rusa is a canon of Valencian culinary tradition and another one of those staple nibbles that are plonked on the table before, or during a large family gathering.
It is best eaten the day after prepping and should be served quite cold. Nothing beats homemade mayonnaise, so I am including the (very easy) recipe here. The quantities make enough for 8-10 people to have a good serving-spoon full each, with leftovers.
What you need for the salad:ingredients
1 kg old potatoes (old means less water content)
1/4 kg carrots
1/4 kg French beans
4 hard-boiled eggs
2-3 tins of tuna, drained
50-100g of little gherkins
What you need for the mayonnaise:
1 egg
a pinch of salt
sunflower seed oil
a splash of white wine vinegar

What you do:
Peel and chop your potato into large chunks. All the vegetables need to be boiled but not to total softness – Iaia insists that they need to be al dente so that the whole finished salad doesn’t degenerate into mash.  I put the potatoes into cold water, and once it came to a boil, put the egg timer on for 10 minutes with good results.  As soon as the totties are cooked, drain them and spread them out in a wide, shallow dish to cool completely. Now boil your carrots and beans, refreshing the latter with cold water once cooked so that they stay a nice bright green instead of going a grisly grey. Let all the veg cool right down before continuing.
A lot of people chop their potatoes and carrots into pretty dice, but Iaia says it’s easier to roughly mash, so that is what I do.  You do need to chop the beans, gherkins and eggs into little bits. Mix all of the ingredients together, adding salt to taste and then you are ready to make mayonnaise.
There isn’t any real mystery – you just need a stick blender and a steady hand. Crack the egg into a deep cup, add a pinch of salt and about 1/2 glass of sunflower seed oil (olive is possible, but it makes a very strong-tasting mayo). Start blending, and as soon as you see the mix turning creamy white and thickening, pour a thin, steady stream of oil in as you mix, until you have enough mayonnaise. Add a splash of vinegar to taste at the end, and there it is!mayo
Now you need to spoon your mayonnaise over the salad and mix well until it is evenly gluggy. Iaia uses quite a lot more than I do because I tend to get mayonnaise headaches. Nobody believes me, but it’s true. Pile the salad up into an Uluru shape and spread a thin layer of mayonnaise over the top as if you were icing a cake. Iaia grates a boiled egg yolk over the top to decorate, but I ran out of eggs and so couldn’t. Leave the salad in the fridge until you are ready to eat it. Yum.serving

Serve with: breadsticks

Coca gallega (Galician-style pizza)

A compulsory part of any major meal here is the picaeta, which is a rough equivalent to “nibbles”.  In our family, one of the most appreciated nibble foods (apart from the ubiquitous home-roasted peanuts, olives and crisps), is Auntie Joaquina’s Coca Gallega, a pizza-like pasty which is cut up into squares and devoured almost as soon as it gets to the table.
This recipe is easy, although you should remember to do the basic tomato mix the day before to ensure that it has the right texture and depth of flavour. Feel free to leave out the tuna if you don’t like it, or don’t want to consume the noble fish, and (speaking from experience) it is no great disaster if you forget to add the pine nuts, although they do provide good little nubby bits to bite.
The most complicated part of the recipe is moving the pastry once you have it rolled out, but a rolling pin and a bit of flour solve things admirably.
This recipe gives you quite a bit of pizza. We had four friends staying over for the Easter weekend, and I served it with a big green salad and a plate of Serrano ham for dinner – there was enough left over for morning tea on Sunday.   It’s perfect for taking along to a buffet-style party or picnic!

What you need for the filling:123
1/3 glass of olive oil456beeroil
1 kg of tinned tomato
1 green Italian pepper
1½ spoonfuls of sugar
5-6 cloves of garlic
3 tins of tuna in oil
50g of pine nuts
4 boiled eggs
What you need for the pastry:
1 glass (200ml) sunflower oil
1½ glasses (300ml) beer
a good pinch of salt
plain flour (as much as the liquid admits)

What you do:
It’s best to prepare the tomato base the day before you want to cook the pizza. Heat the olive oil in a large frying pan and gently cook the garlic without letting it burn. Chop the pepper into small pieces and add to the garlic, frying lightly. If your tinned tomatoes are not already pureed, smoosh them up in the blender until they are smooth, then add to the pan. Chuck in the sugar to reduce the acidity of the tommies. You now need to let as much liquid as possible evaporate, while the tomato fries itself tasty.  It took about ¾ of an hour the other day, on a medium flame and with a piece of foil over the top of the pan to stop tomato splatting all over the place.  Once you think the mixture is dry enough, remove it from the heat and leave it in the fridge until tomorrow. tomatoThe following day, drain the tuna of all oil (or brine), chop the eggs into small chunks and add both, together with the pine nuts, to the now cold tomato. Mix well and taste for seasoning. Set aside while you make the pastry and get the oven warm.IMG_1212Heat your oven to 160ºC, preferably with the heat only coming from the bottom. If you can’t choose, then place the pizza down low in the oven to avoid any burning on top.  Pour the beer and oil into a large mixing bowl and add a pinch of salt. Now add flour bit by bit (about half a glass at a time) and mix in with a metal spoon until a dough begins to form.  You are looking for quite a soft, oily dough but one that doesn’t stick to your fingers. When it’s ready, turn it out onto a floured surface and work it lightly – this isn’t bread, so there is no need to knead for any longer than a couple of minutes.  pastryDivide the dough into two parts, one slightly larger for the bottom layer.  Using a flat oven tray (about 60 x 60) lined with baking paper as your guide, and enough flour to stop things from sticking, roll out the bottom layer until it is about 2-3mm thick. Prick with a fork.  Spread your tomato mix over the pastry, exactly as you would a pizza.  Use it all.
Now roll out your lid; it should be a little thinner than the bottom. Transferring it to the pizza can be tricky, but if you lightly flour the surface of the pastry and your rolling pin, you should be able to carefully roll the flat dough up onto the pin and then unravel it over your tomato.
Use a fork to press the edges together and prick the top surface. Brush with a beaten egg and pop it into the oven for about 40 minutes, checking from time to time. UntfinisheditledIf you find the base is cooked, but the top is still very pale, you can switch to the grill only, keeping your eye on the pizza to make sure it doesn’t get frazzled. Allow to cool completely before serving (it’s even better the next day!)serving

Serve with: other nibbles, or a salad and some cured meats for a main meal.

Coquetes de cacau (peanut biscuits)

I think my husband Oscar’s most amusing claim to fame is that he was once the recipient of the most expensive peanut biscuit crumbs ever.  We had moved to Australia, and back in Valencia, Oscar’s grandmother was fretting because she was convinced that without his favourite peanut crackers, her little Oscar would simply not be able to survive. So she made a huge batch and posted them to him. From Spain. In a box. Without bubblewrap.
I think the postage cost about 8,000 of the old pesetas, which is roughly 80 Australian dollars and considering that the crackers contain only flour, oil, a handful of peanuts and a splash of beer, and considering also that international post is not known for its delicacy of handling, you will understand what I mean by the most expensive crumbs ever.

Anyway, these savoury little biscuits are an essential part of this family’s diet – everyone loves peanuts, and everyone loves cocquetes de cacau. They are also quick and easy to make, which is good because they are in constant demand!

What you need (for about 12):ingredients
Half a glass of olive oil
Half a glass of beer
As much flour as it takes to form a soft dough
A good pinch of salt
Raw, shelled peanuts

What you do:
shapingHeat your oven to 190ºC and lightly flour a baking tray. Pour the oil and beer into a mixing bowl and add a pinch of salt.  Start stirring in flour, adding gradually until the dough comes together. It will be oily but not sticky and will form a lovely glossy little ball. Turn the dough out onto a floured surface and knead lightly for a few minutes. Then break off walnut-sized (ish) balls and squash flat on yourIMG_0304 palm to get a roundish, flattish disc.

Lay the discs onto the floured tray and prick them with a fork.  Then decorate with your peanuts, give an additional sprinkling of salt and bake for about 15 minutes, though you really need to keep an eye on them to ensure they don’t burn!

Allow the biscuits to cool completely on a rack before crunching into one. If there are any left to store, do so in an airtight container for a couple of days at most.

finished biccies

Serve with: tasty cheese and beer