January 1st 1993: As a recent arrival to this part of the world, I had kindly been invited to celebrate the new year by eating Putxero – a very traditional, very communal meal – with the family whose apartment I was renting. Unfortunately, I was shockingly hung over, so it will come as no surprise that the sight of a very large, very wobbly lump of boiled pork fat sitting on the table in front of me, waiting to be spooned onto my own plate and then into my mouth had a somewhat adverse effect on my delicate tummy. I was gently (thankfully!) ushered to a nearby sofa and furnished with a pillow, a blanket and a cup of mint tea to recover from the shock.
Of course, Putxero (or Cocido in Castillian) is not just boiled pork fat. It is the Valencian version of the well-known Italian Bollito Misto, or the French Pot au Feu and as such has a great number of other ingredients which, when all boiled together, make the most fantastic stock I have ever tried. I have become used to the idea of eating a little fat and now fully appreciate the incredible flavour it gives to the other meat and vegetables. I always take a small piece and smoosh it into the rest of my plateful as though it were butter in a mash.
Oscar’s grandmother cooked putxero every Thursday of the year. Most families will do so once a week or at least every fortnight. And it is Iaia’s Christmas Day lunch of choice. Like paella, there are many variations to the ingredients, but unlike paella, these variations occur from house to house, not town to town. I tend to put a lot more vegetables in than Iaia, and she will now always pop at least a turnip in if she knows I am eating with her. It is a long, long cook, but you don’t really have to do anything except make sure nothing boils over. This morning I started cooking at 8 a.m., went out for two hours mid-morning, leaving the heat on very low, then came back and finished everything off for lunch at 1:30. This extended cooking time ensures tender meat and a broth which has had time to draw all the rich flavour out of the stock-bones.
The other wonderful thing about putxero is that it provides (at least) three excellent meals for very little money. I will show you all three over the next couple of days.
DAY ONE:
What you need:
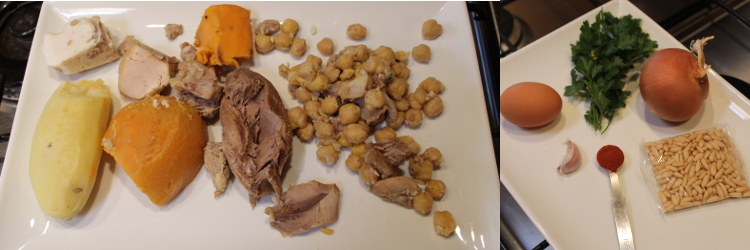
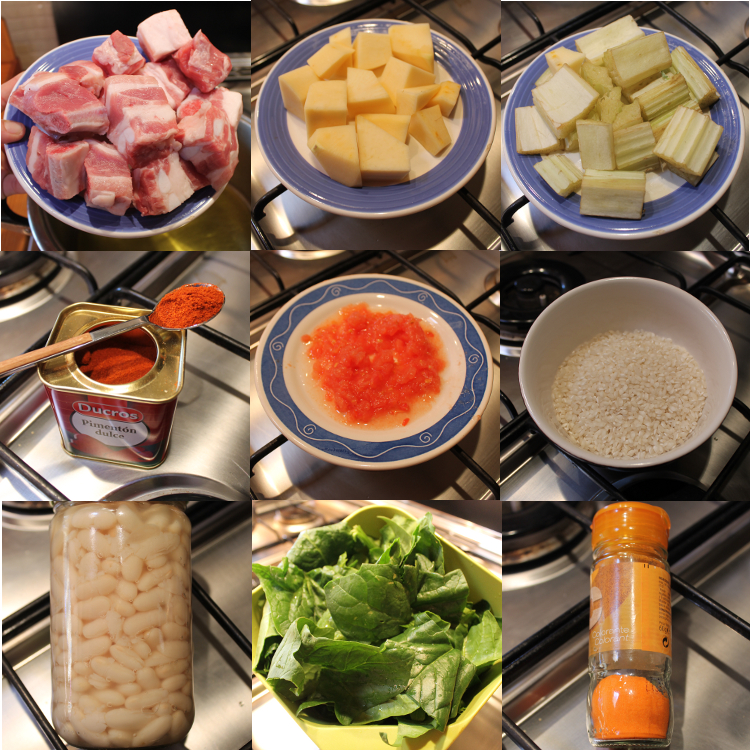
MEAT
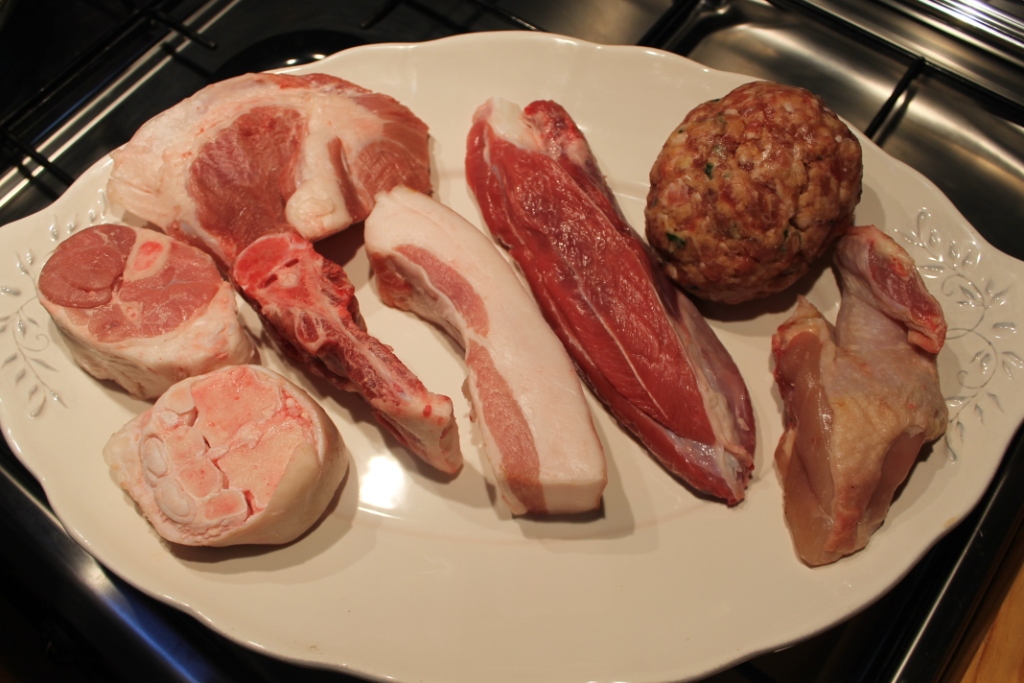
a piece of garreta (beef calf muscle)
several stock bones (pork and beef, include a shin bone with some meat on it)
a piece of broiler chook
a generous piece of pork back fat
a putxero meatball, which is made of:
minced pork
lard
breadcrumbs
cinnamon
egg
salt
parsley
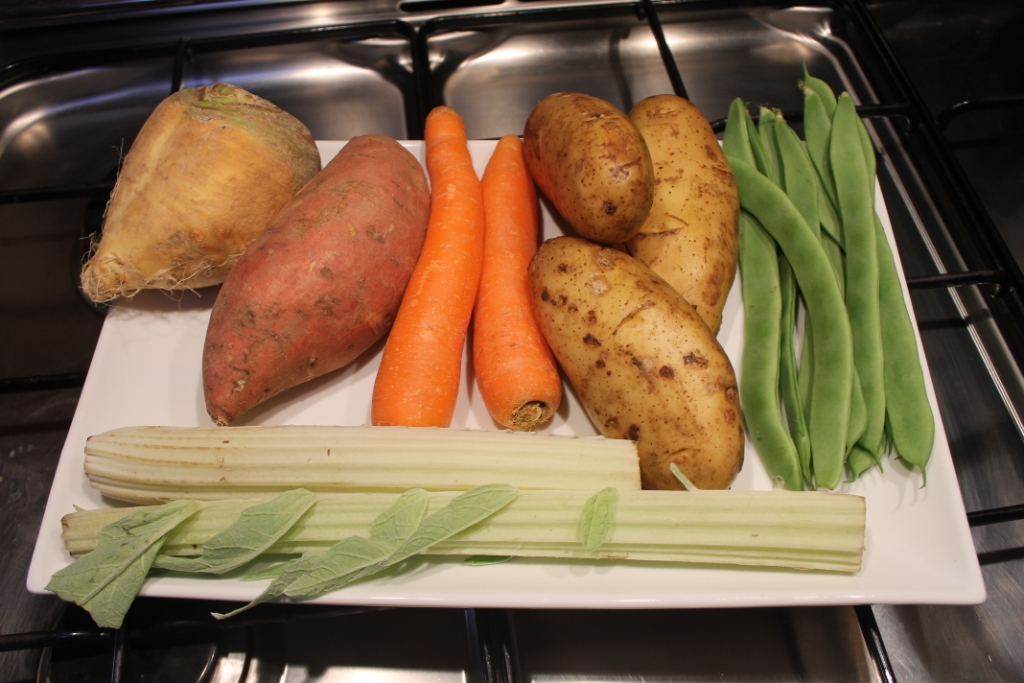
VEGETABLES
cardoon
potatoes
swede
carrots
flat beans
sweet potato
(some people add parsnip, but I don’t like it)
OTHER STUFF
chickpeas (soaked overnight)
salt
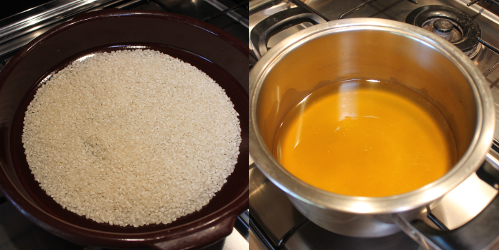
rice
water
What you do:
Place the chickpeas, bones, beef, chook and cardoon in a saucepan large enough to hold everything and boil comfortably (mine is a heavy-based, 8-litre, stainless steel beauty). Leave the fat, meatball and veggies until later so they don’t disintegrate. Cover generously with water – I used 3 litres today, but sometimes go up to 5 – and bring to a boil. Skim all rising scum off the surface at least twice until your water boils cleanly, then turn the heat down to a minimum, cover and leave to simmer for three or four hours.
I usually put about a tablespoon of salt in while the bones and meat are boiling, but you can add it after everything is cooked to make sure it isn’t too salty if you prefer.
After about two hours, add the peeled and halved turnip, the fat and the meatball. Then, when there is about an hour to go before lunch, peel your other vegetables and add them. Chop the sweet potato, but leave everything else whole. Add water if things are poking out and salt to taste. If you have read other posts, you may remember that white rice is not very popular here, so we also add a little orange food colouring at this point. Optional of course!
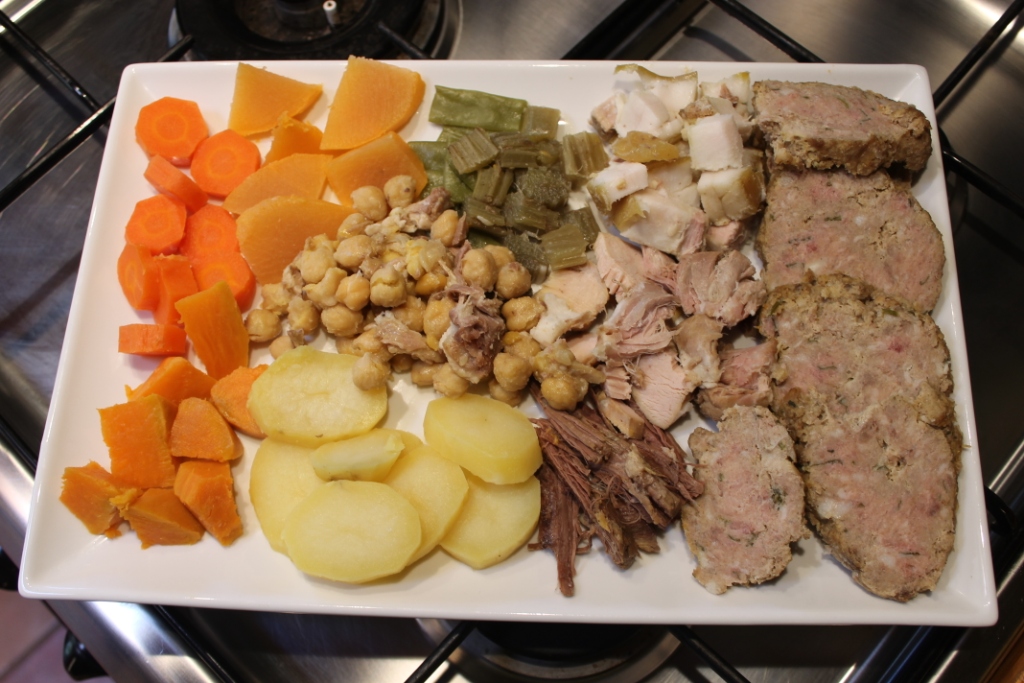
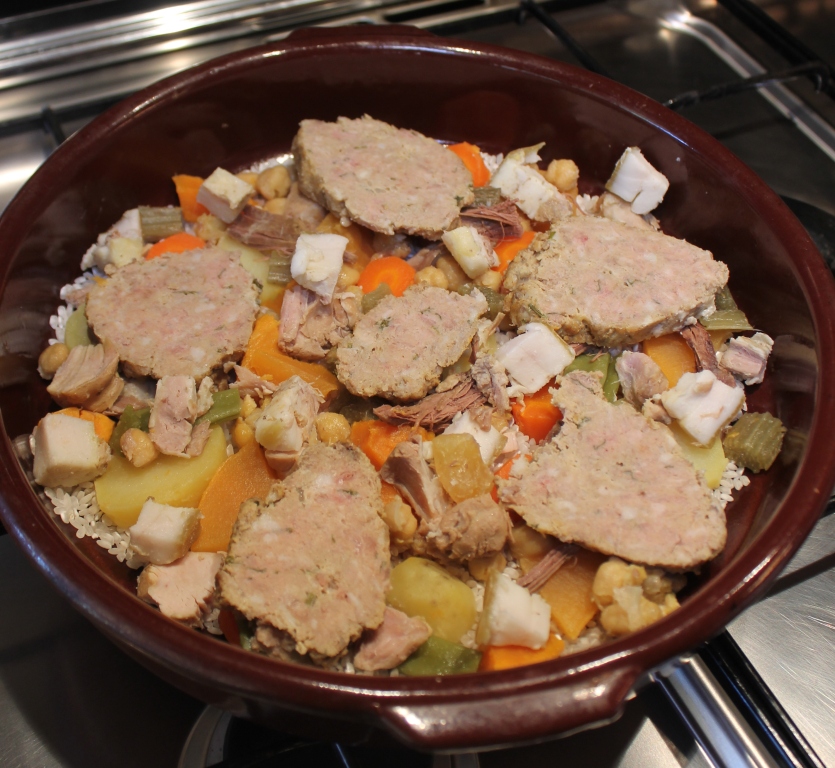
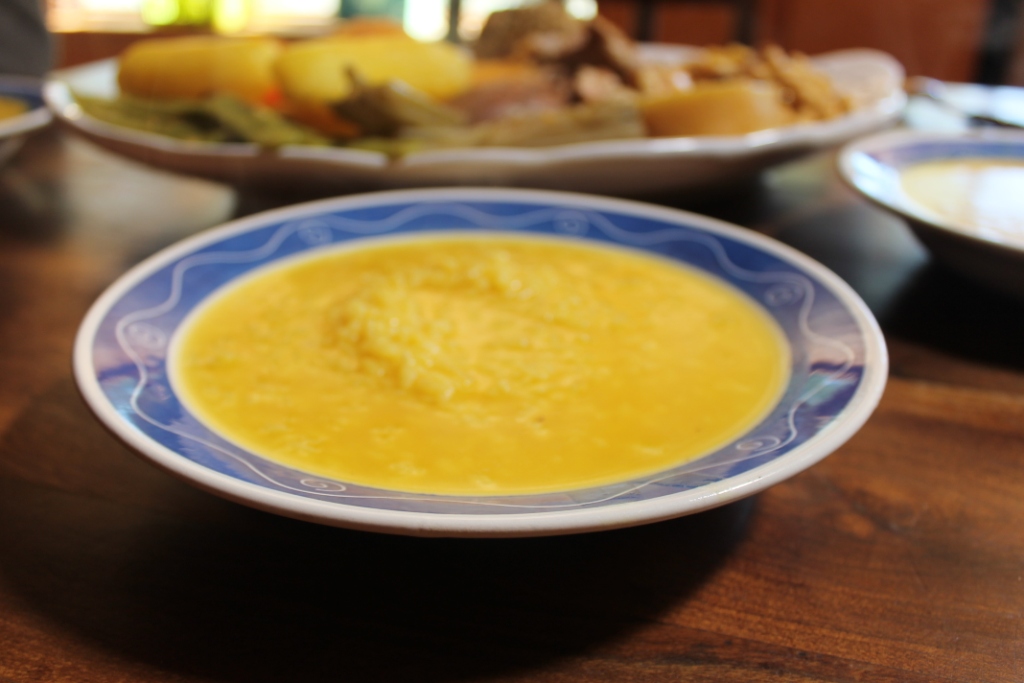
When you are almost ready for lunch, you need to decant enough stock to cook the first course of rice. For three people, I use about a glass and a half of rice (six of the handfuls you can see in the photo above, plus one for the pot) and roughly three times that of stock. Actually, this recipe is absolutely imprecise and relies wholly on your judgment – remember that the rice ought to be served in broth, not dry. Add a touch of cinnamon and a little parsley if you have it, and boil away for about 17 minutes, or until cooked. Place in bowls and set on the table to cool slightly while you get the rest of the lunch ready. Strain off the rest of the stock for tomorrow and arrange the meat and vegetables on a large platter.
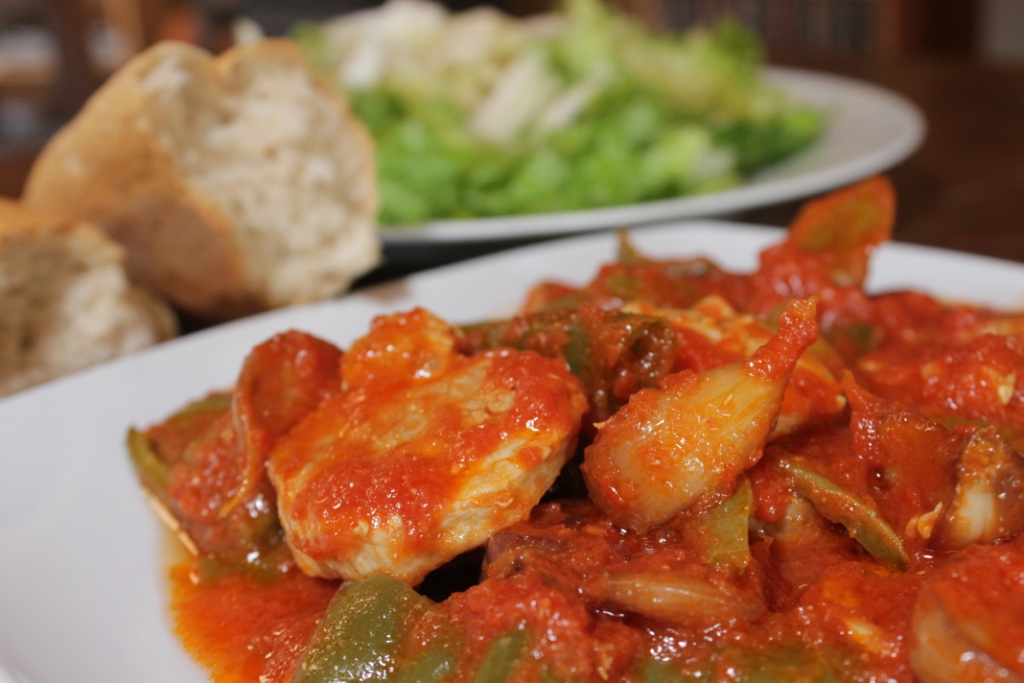
  Once you’ve eaten the rice, each person serves themselves what they like most. The shot below shows what I chose today (note, no chickpeas – Oscar eats them all!). You should be aware that it is perfectly polite to mash things up a bit, mixing the fat into the potato and getting a good bit of everything into each mouthful. Delicious and fun.
 Once you’ve finished eating, store the stock and leftover pieces somewhere cool overnight (in the fridge if it’s summer), separating and discarding the bones and making sure the stock is well-strained.
Serve with: when Oscar was a teenager, he would eat bread with this! Nowadays, we settle for a glass of wine.


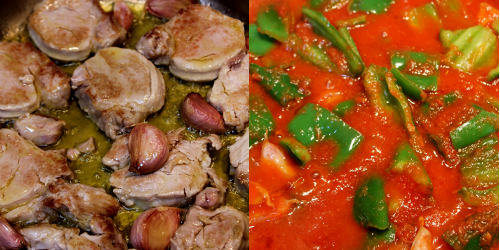 Once the tomatoey mixture is bubbling gently, turn the heat down and put the meat back in the pan. Season to taste, cover, and finish cooking over very low heat for about 20 minutes.