Arros al forn d’estiu (summer baked rice)

The story goes that when my husband Oscar was a boy, the family would pack a carload of towels, sun shades, chairs, cousins, food and drink and head off to the beach for the whole day. Iaia would always take along a whole, tea-towel-wrapped, ceramic dish of Summer Baked Rice, especially for her eldest son, and he would come rushing out of the sea to demolish the whole lot by himself, washing it down with chocolate milk. It is still one of his favourite lunches!

The amounts here feed between three and four people. If you don’t have a ceramic dish, use a metal baking tray, but increase the amount of water slightly so that it is exactly double the amount of rice.

The black pudding sausage is optional!

What you need:ingredients
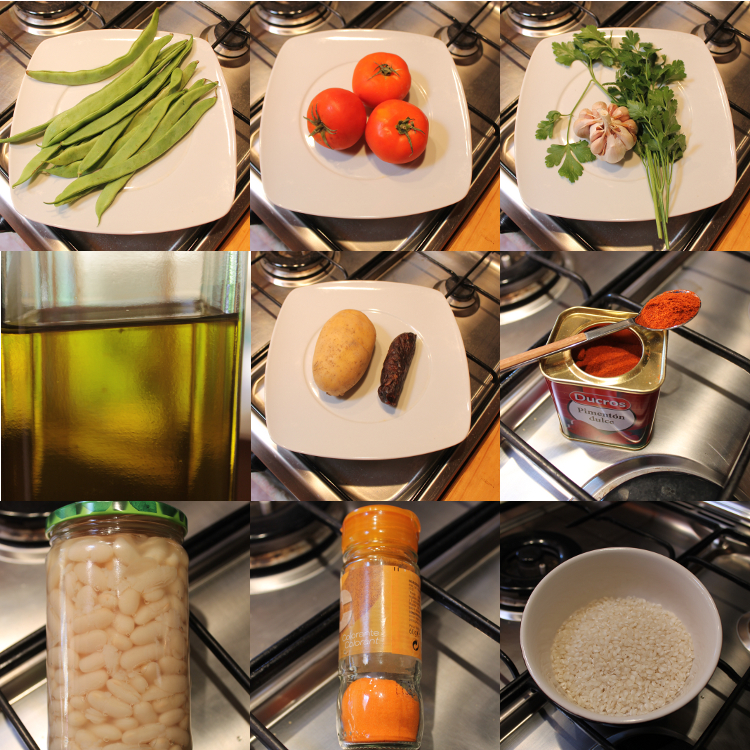
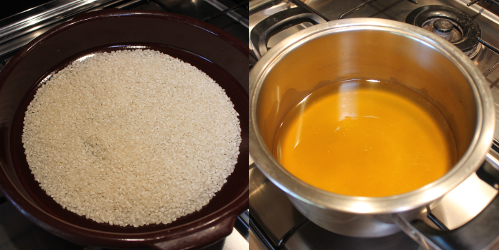
2 glasses (roughly 400g) Spanish rice
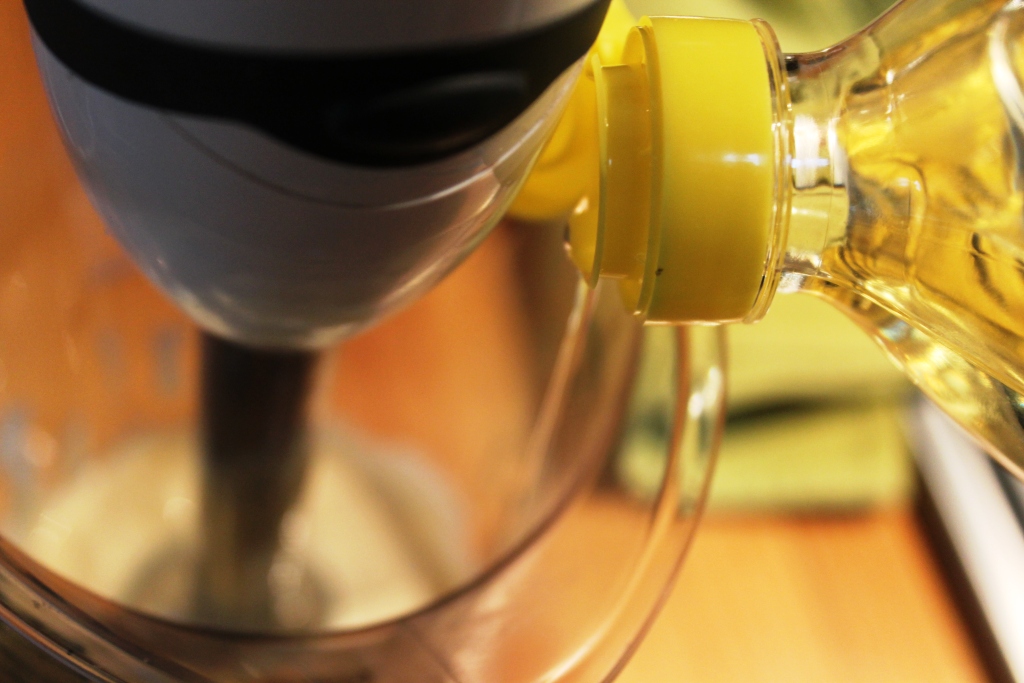
1/2 glass of olive oil
a whole head of garlic
three or four ripe tomatoes
a handful of flat green beans
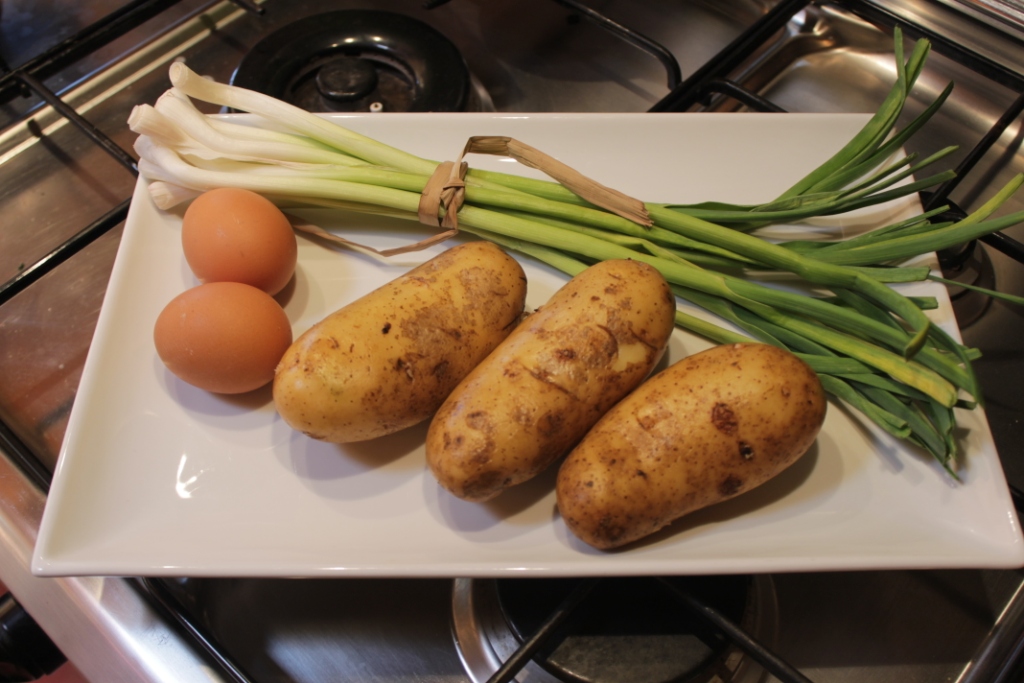
a good-sized potato
150g white beans
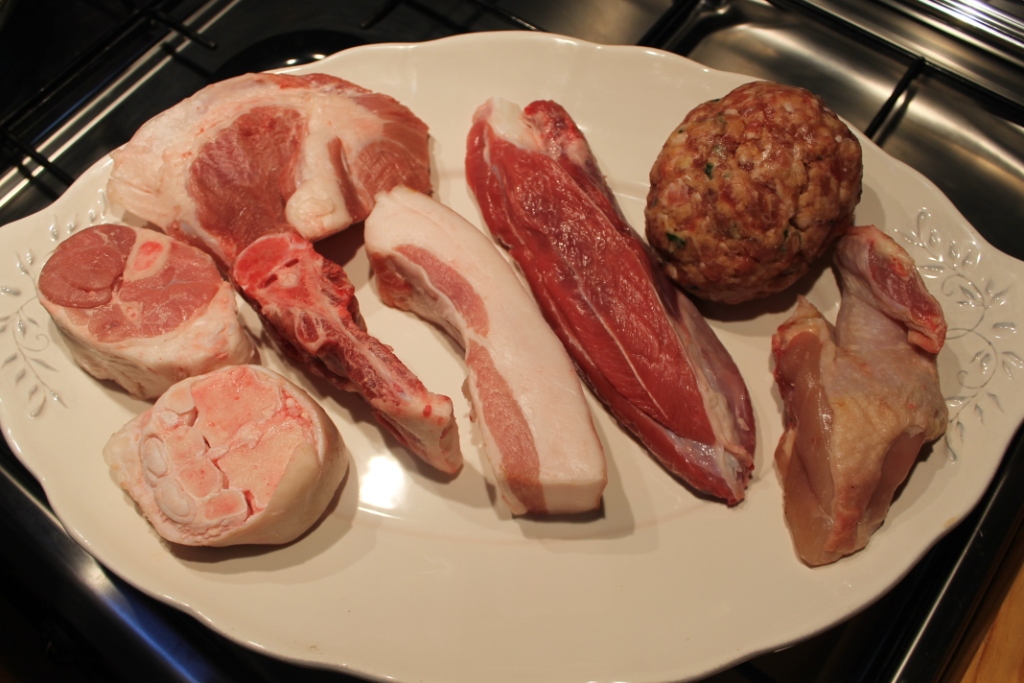
a black-pudding sausage (botifarra)
parsley
1 tsp sweet paprika
saffron/orange food colouring
water

What you do:
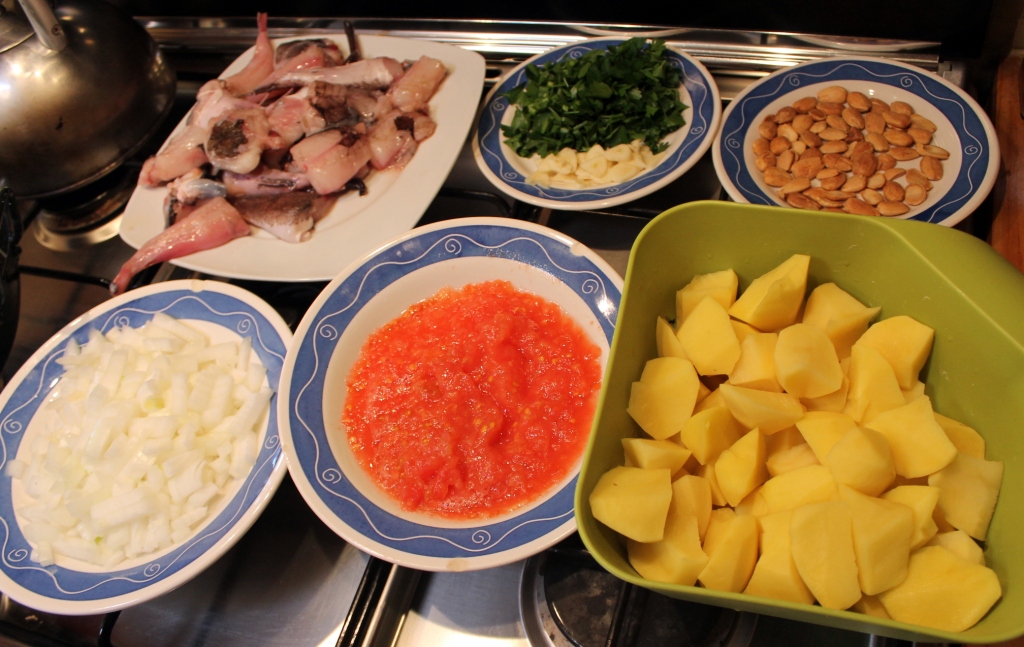
Pop the oven on at 200ºC and prep by measuring out your rice and oil, grating one of your tomatoes, slicing the potatoes, breaking the beans into pieces and putting your water on to boil. The amount of water is directly dependent on the amount of rice you use and the type of dish you cook in. If using a metal tray, use two glasses of water for every glass of rice. For ceramic dishes, hold back half a glass or so of liquid. For this particular recipe, I used 750ml of water for 400g of rice.prepped stuffPICADILLO
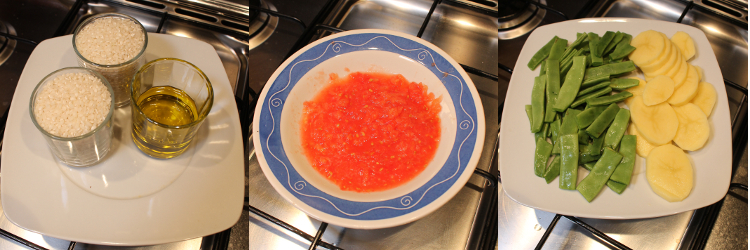
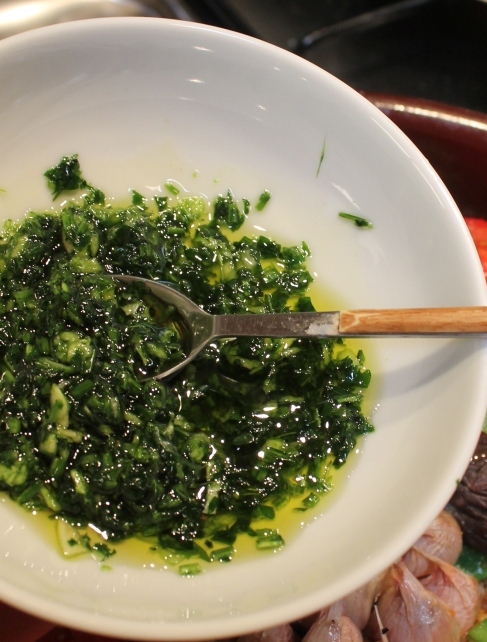
You will also need to make what we call a “picadillo”, which is a bashed-up clove of garlic with a small bunch of parsley and a bit of oil added. I use a mortar and pestle, but finely chopping is good too. Set this aside for a moment while you get on with the frying and assembling.

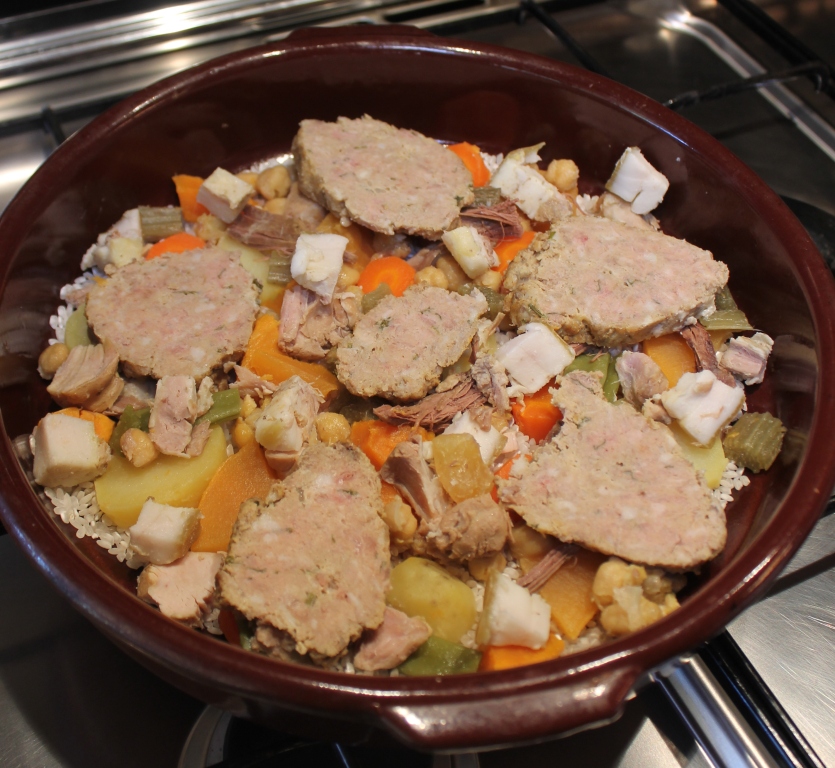
Place the rice into the bottom of your ceramic (or metal) dish and gently shake it so it settles evenly over the base.

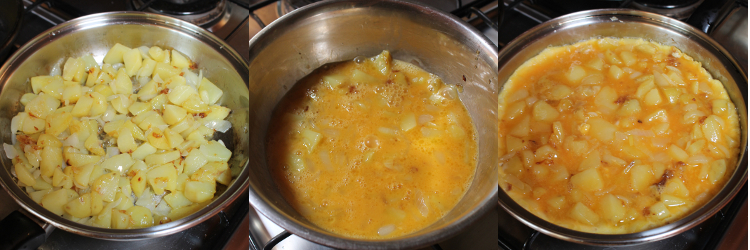
Now pour the half-glass of oil into a frying pan and get the heat on. Place the whole garlic head in the oil for a quick, oil-flavouring fry. Once it has been on for a few minutes, drop it into the saucepan with your water and let it simmer gently while you prepare everything else, this will help ensure that the cloves are all cooked through by the time you come to eat them.FRYING
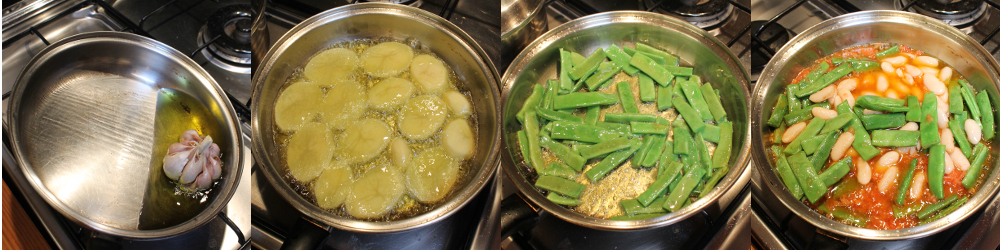
In the same oil, lightly fry your sliced potatoes. Remove and place over the rice, distributing the pieces evenly. Gently fry your green beans and when they look bright green and slick, add the grated tomato and white beans. Fry for a minute or two longer, then in goes the paprika for a quick swirl. Remove from the heat and pour over the potatoes and rice, spreading things evenly over the whole dish. Slice the remaining tomatoes thickly and place them on top of the other ingredients. Nestle the head of garlic in the middle and (optionally) place the sausage right next to it. Spoon your “picadillo” over everything. Sprinkle a bit of food colouring on top to get the Spanish yellow that people here prefer to white when it comes to rice.ASSEMBLED
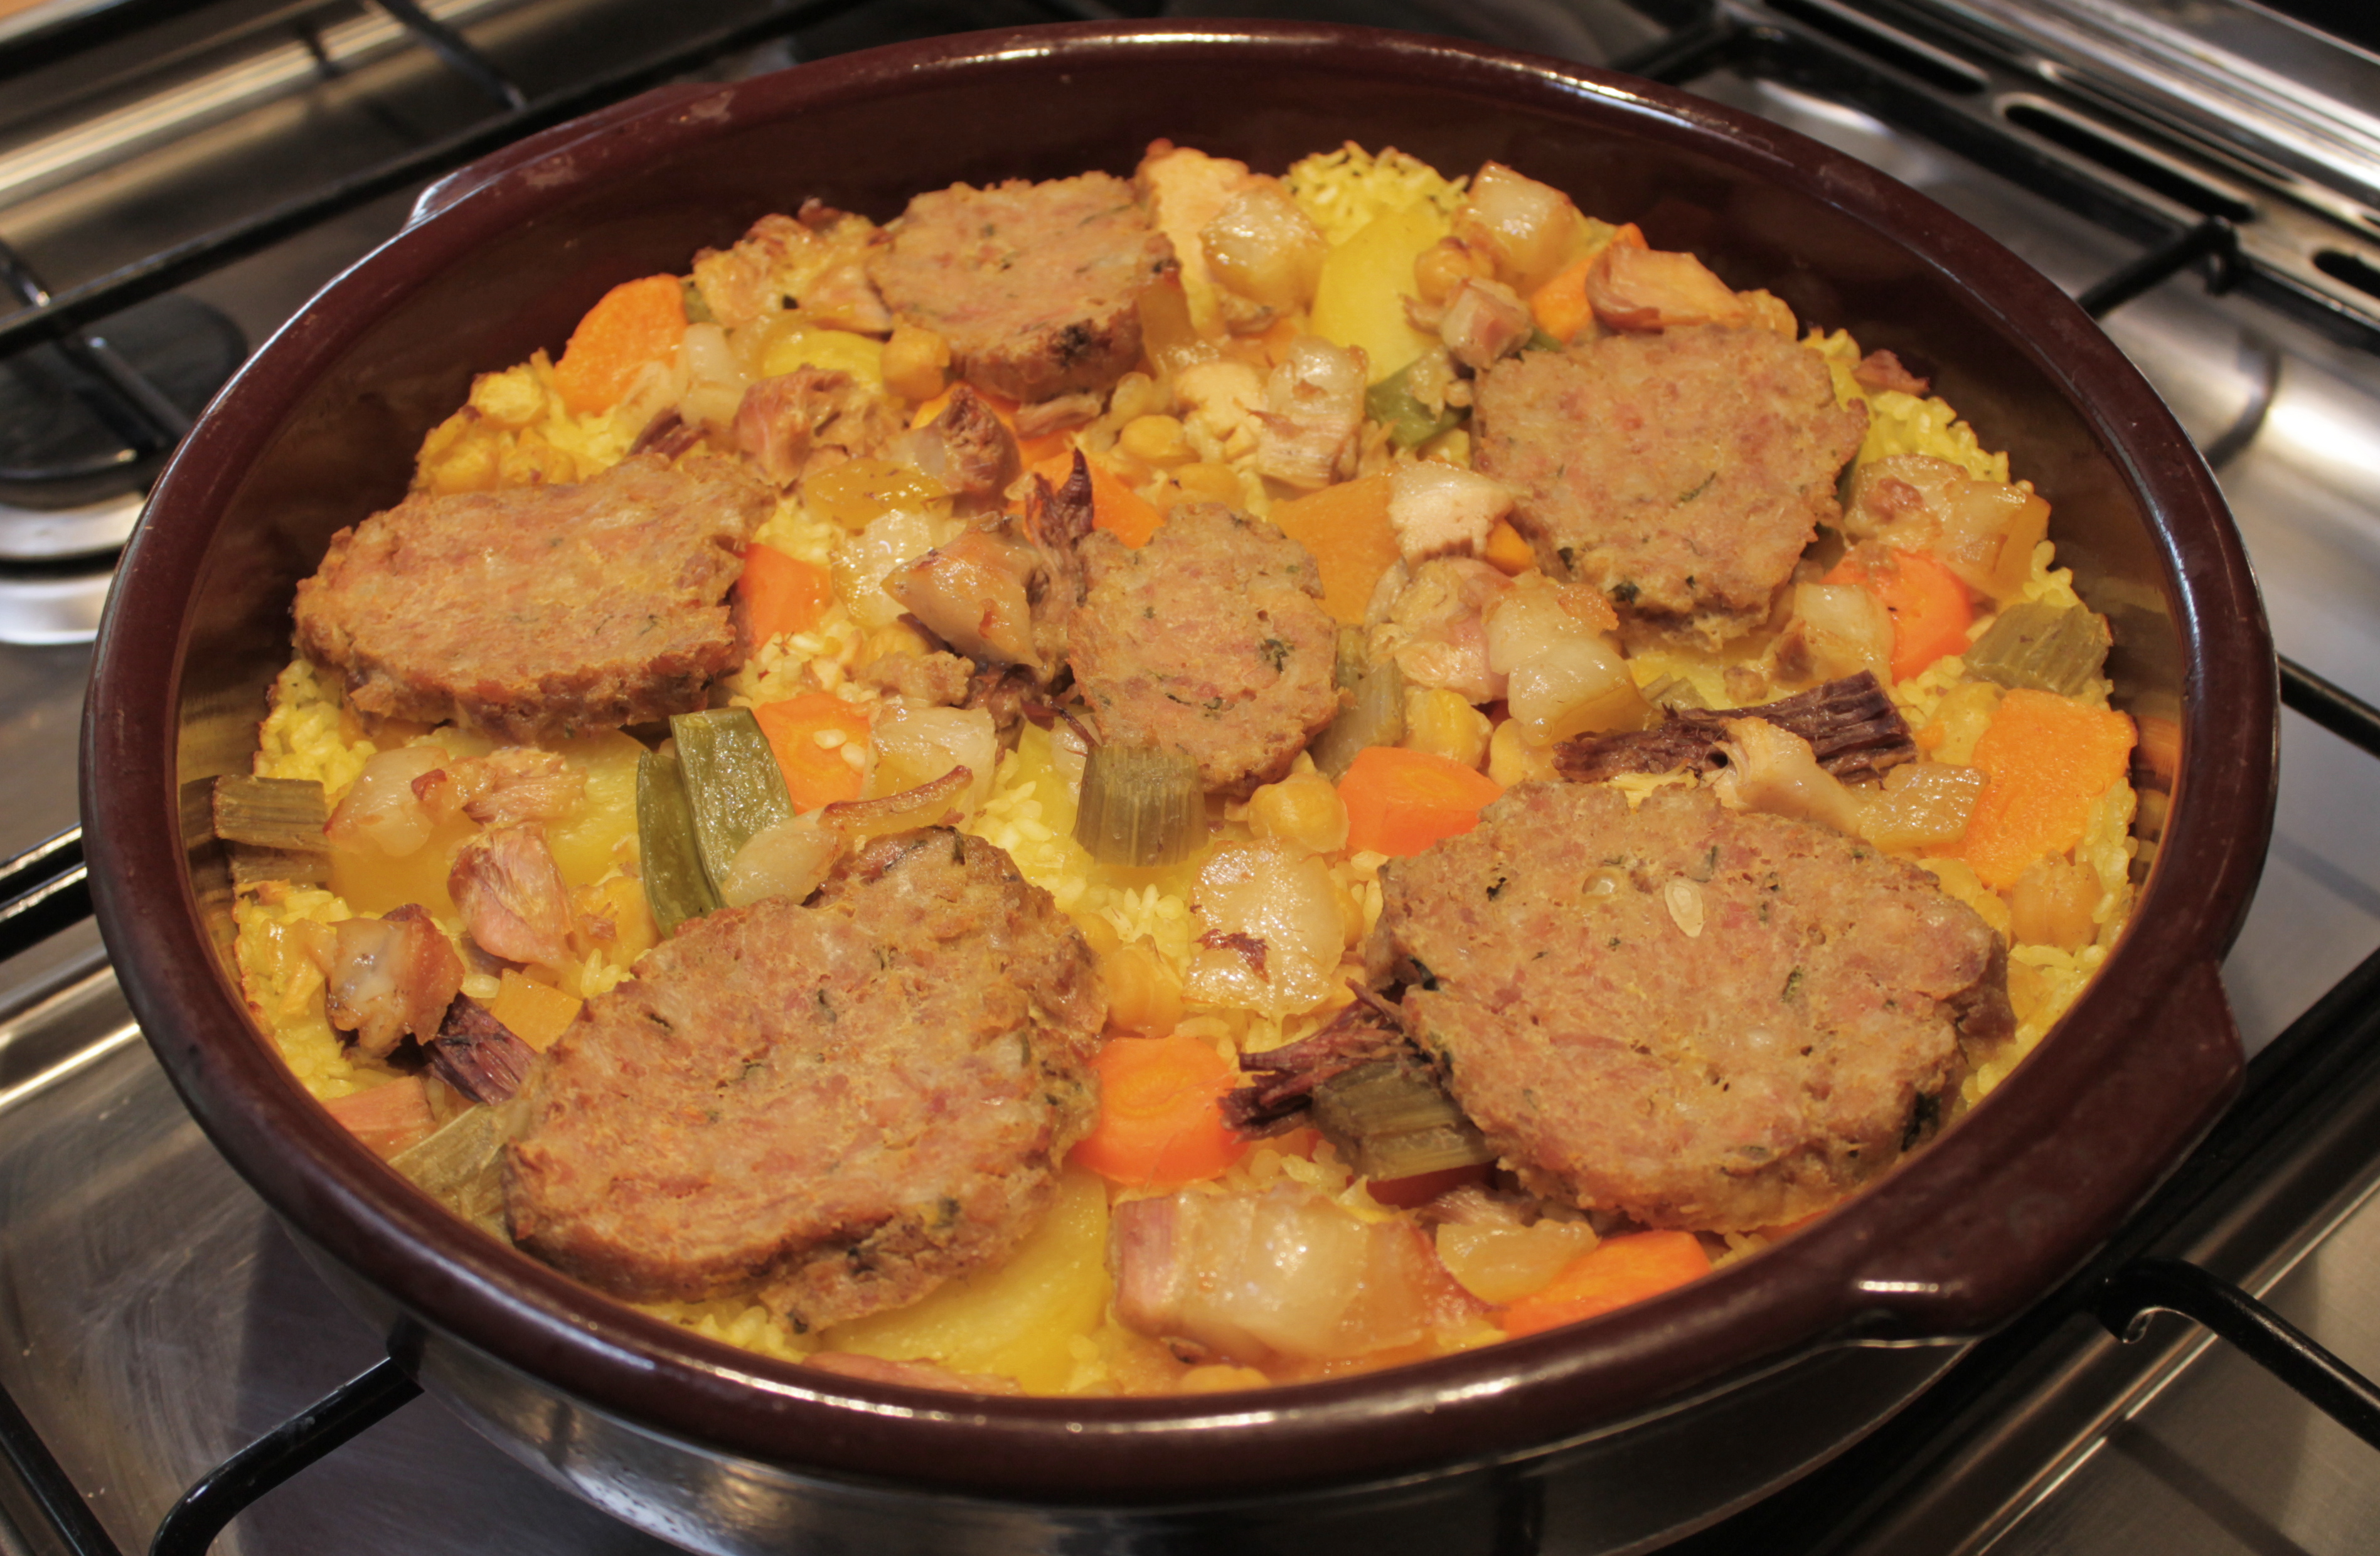
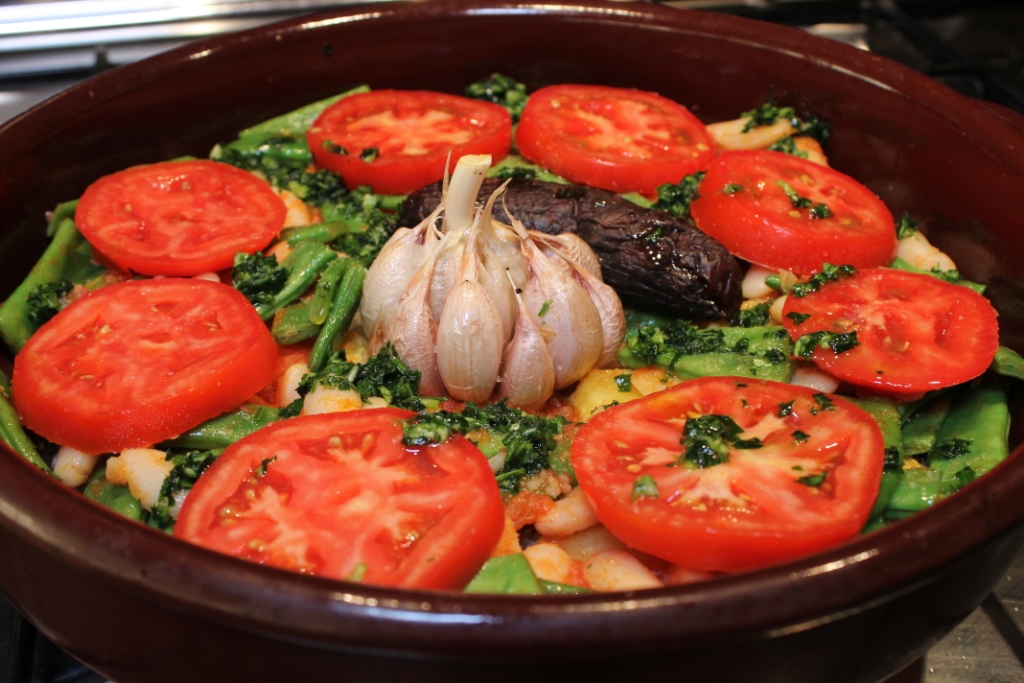
Now, hopefully, you will still have the right amount of water in your saucepan, and it will be boiling hot. If it looks as though some of it has evaporated, add a little. It’s important that the water be boiling when you add it to the dish so that the rice starts cooking immediately; otherwise, you might get a gluggy mess. So, carefully pour the hot water over your rice and slip it straight into your oven. Bake until the water has all been absorbed; depending on how hot your oven really is, this should take between 25 – 40 minutes.COOKED
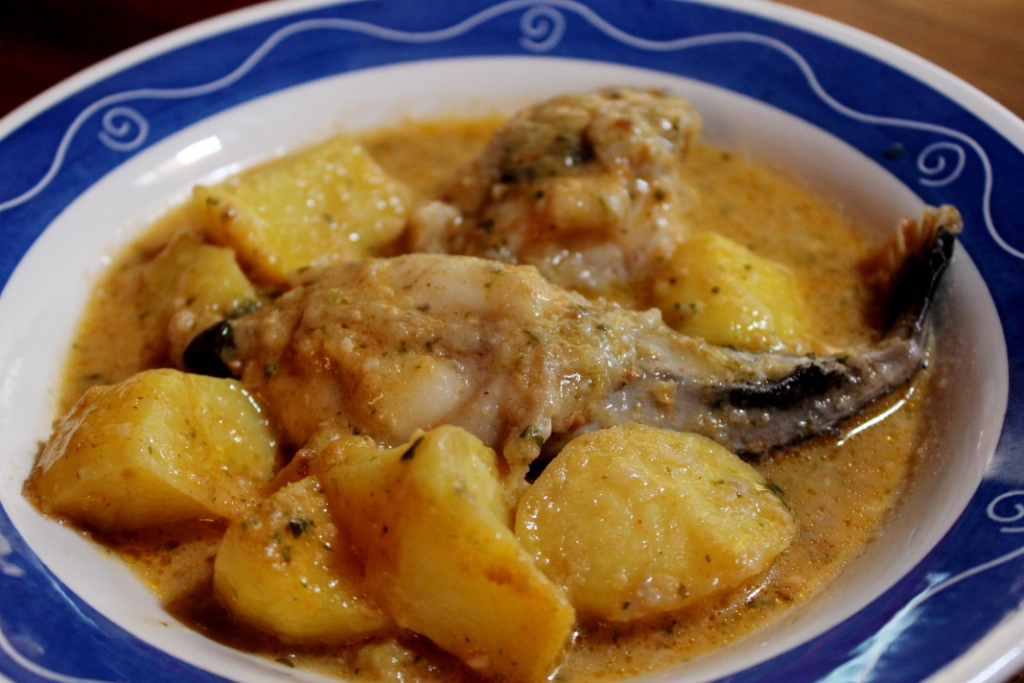
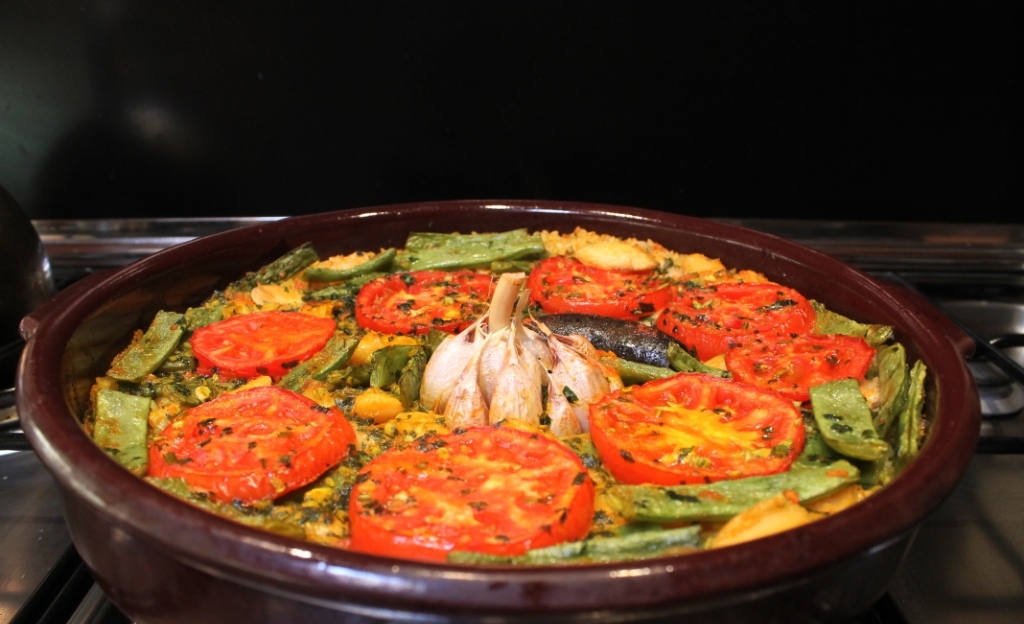
Let the rice cool for a few minutes before tucking in, or I promise you will burn the bejesus out of your mouth.

PLATEDServe with: sweet raw onion slices go beautifully on top, cold chocolate milk is a must for beach-goers, while at-homers could try a fresh young red.

Spanish Omelette (aka potato omelette)

Spanish Omelette in Spain means potato omelette, with or without onion. Everyone has their own secrets for making one of the most fantastic omelettes ever, and discussions can get quite heated when it comes to whose is the best! Iaia always uses onion and can turn out a perfect tortilla with her eyes closed. I still need to keep mine open, especially with the flipping.
This dish is incredibly versatile as it can be consumed hot or cold, served as an appetiser, a main meal, a snack, in a roll, on a plate, in bite-sized squares on toothpicks, with tomato, with mayonnaise, with salad, at a picnic, a dinner party, as part of a buffet…need I go on?
The recipe here is for a large dinner-plate-sized omelette which will provide a good slice for 6-8 people. I used a stainless steel frying pan as it’s the only large pan I have, but I highly recommend using a non-stick pan instead.

What you need:ingredients
3 potatoes
1 onion
6 eggs
olive oil
salt
a non-stick frying pan

What you do:
Chop the potato and onion into chunky pieces, as you see above. Heat a generous amount of olive oil so that nothing sticks or burns (you can always drain any excess off before adding the eggs), and gently fry the onions for a minute or two before adding the potatoes. Iaia insists on covering the potatoes as they cook so that their edges become sort of fuzzy instead of sharp. This helps the egg stick to the totties later and gives you a much more attractive finish without any air holes between the potato and egg.process1Beat your eggs in a large bowl and add a good pinch of salt. Once the vegetables are cooked, but not falling to pieces, use a slotted spoon to transfer them to the egg bowl.  Drain any excess oil from the frying pan, but remember you will need a healthy coating to stop any sticking (even in a non-stick pan). Once the pan is well heated again, pour the whole egg and vegetable mix in and move it gently around (without disturbing the edges) so that the omelette cooks evenly, but take care not to turn it into scrambled egg. You can cover a very thick omelette to help with the cooking but don’t walk away!
After a little while, you will have a browned bottom and edge, and curd-like centre. It is time to flip (for photos of this see the Spinach Omelette recipe).  Take your pan off the heat and cover it with a plate. Wrap a tea towel over the top and base of the pan to avoid burning yourself, and grip firmly from either side. Flip with conviction, so the omelette flops out onto your plate in one piece. Put your pan back on the heat and slide your now raw-side-down omelette back into the pan to finish cooking. I like to use a spatula to tuck the edges under a little because it gives a lovely rounded edge; this is especially important if you are cooking a larger omelette.
The trick is now to cook the omelette to the ideal point – neither runny nor rubbery. Practice will show you what it feels like to the touch when it is ready.  Turn out onto a plate and allow to cool (or not!) before eating.finished

Ensaladilla Rusa (a not-altogether-Russian potato salad)

About 10 years ago, a Russian girl called Lana came to stay with someone in the family as part of an exchange programme. My mother-in-law proudly served up a huge batch of Russian Salad to make sure Lana felt at home and was amazed when told that it was about as un-Russian as a salad could get! It seems that our Lana had never eaten at the Hermitage in Moscow circa 1860, where apparently this style of salad was first created by head chef Lucien Olivier. Now Ensaladilla Rusa is a canon of Valencian culinary tradition and another one of those staple nibbles that are plonked on the table before, or during a large family gathering.
It is best eaten the day after prepping and should be served quite cold. Nothing beats homemade mayonnaise, so I am including the (very easy) recipe here. The quantities make enough for 8-10 people to have a good serving-spoon full each, with leftovers.
What you need for the salad:ingredients
1 kg old potatoes (old means less water content)
1/4 kg carrots
1/4 kg French beans
4 hard-boiled eggs
2-3 tins of tuna, drained
50-100g of little gherkins
What you need for the mayonnaise:
1 egg
a pinch of salt
sunflower seed oil
a splash of white wine vinegar

What you do:
Peel and chop your potato into large chunks. All the vegetables need to be boiled but not to total softness – Iaia insists that they need to be al dente so that the whole finished salad doesn’t degenerate into mash.  I put the potatoes into cold water, and once it came to a boil, put the egg timer on for 10 minutes with good results.  As soon as the totties are cooked, drain them and spread them out in a wide, shallow dish to cool completely. Now boil your carrots and beans, refreshing the latter with cold water once cooked so that they stay a nice bright green instead of going a grisly grey. Let all the veg cool right down before continuing.
A lot of people chop their potatoes and carrots into pretty dice, but Iaia says it’s easier to roughly mash, so that is what I do.  You do need to chop the beans, gherkins and eggs into little bits. Mix all of the ingredients together, adding salt to taste and then you are ready to make mayonnaise.
There isn’t any real mystery – you just need a stick blender and a steady hand. Crack the egg into a deep cup, add a pinch of salt and about 1/2 glass of sunflower seed oil (olive is possible, but it makes a very strong-tasting mayo). Start blending, and as soon as you see the mix turning creamy white and thickening, pour a thin, steady stream of oil in as you mix, until you have enough mayonnaise. Add a splash of vinegar to taste at the end, and there it is!mayo
Now you need to spoon your mayonnaise over the salad and mix well until it is evenly gluggy. Iaia uses quite a lot more than I do because I tend to get mayonnaise headaches. Nobody believes me, but it’s true. Pile the salad up into an Uluru shape and spread a thin layer of mayonnaise over the top as if you were icing a cake. Iaia grates a boiled egg yolk over the top to decorate, but I ran out of eggs and so couldn’t. Leave the salad in the fridge until you are ready to eat it. Yum.serving

Serve with: breadsticks

Caldereta de rap (monkfish stew)

This is one of Iaia’s signature dishes.  She tends to cook it for us on birthdays and we all love it, especially the thick sauce, which can be either scooped up with fresh bread or spooned up after mashing it into the potato chunks.

Fresh monkfish flesh is a lovely rosy pink. fishtails The frozen stuff does not taste the same, and Iaia refuses to use it. Try to buy smaller fish as their muscles are less fibrous and far more pleasant to eat. Leave some of the skin on if you don’t find it irksome, as this will act as a natural thickening agent for the sauce and enhance its sweet, fishy goodness.

Get the fishmonger to clean the fish but bring wholefishthem home with the heads on, which you can then scissor off and freeze for the best fish stock ever.  The cuts that go into the stew are the whole tail and the loin, both with the bone in.

Iaia swears by olive oil for just about everything and quite happily pours a good half litre into her pan to fry the potatoes. Once they are done, she siphons off about two-thirds of that oil and saves it for paella on Sundays.

What you need for 6:
About 850g fresh monkfish piecesingredients
1 kg potatoes
2 pear tomatoes
2 onions
3-5 cloves of garlic
small bunch of parsley
50g toasted almonds
½ litre of oil for frying (Iaia uses olive)
sweet paprika
2 small chillies, whole*
750 ml good fish stock
flour for dusting the fish
salt and pepper to taste
*optional and to be taken out before the whole dish becomes mouth-numbingly hot!

What you do:
Finely dice the onion, slice the garlic, grate the tomato and chop the parsley. All of these ingredients will end up being blended, so don’t be too fussy about perfect knife work.

Cut the potatoes into chunks. Iaia has a special technique – she stops each cut about ¾ of the way through and then breaks the piece off, saying that this will stop the potato chunks from breaking up as they cook. It seems to work!

Heat your olive oil in a deep pan and fry the potatoespotatoes in batches until golden, but not necessarily cooked through. Iaia says she uses so much oil because you have to have enough to cover the potatoes so that there is no chance of them getting crushed and deformed by constant turning and stirring.

Once the potatoes are done, remove two-thirds of the oil and reheat. Season your fish well with salt and pepper and dust with flour before laying it gently into the hot oil to fry.  You don’t need to cook the fish through; 2-3 minutes on each side is enough. When you remove the fish, place it directly into a wide, shallow, flameproof casserole dish, which is where you will cook and present the final dish.  Distribute the fried potatoes evenly over the fish pieces.

In the same oil, lightly fry the sliced garlic and then add tomatomixthe parsley and onion, cooking until the onion is softened. Pour in your grated tomato and fry until you notice the mix thickening slightly as the water from the tomatoes evaporates. If you are using chillies, settle them into the mix now, but take them out before you blend! Just before you take off the heat, pop the teaspoon of sweet paprika in and give it all a quick stir.

Pour the tomato and onion mixture into a blender along with the whole toasted almonds and pulse to a thick paste.  You can also do this with a stick blender, but avoid over-blending; texture is important here.

mixstockPour this picadillo, or flavour base, over the fish and then add just enough stock to cover everything. Check for salt – fish can be tricky and very easy to over-salt, so it’s best to add small amounts throughout the process than try to rectify with a great handful at the end.

Bring to a boil, turn down the heat and simmer gently for 20-30 minutes, adding stock if you see that it gets too dry, aim for a thick gravy-like consistency.

Like most stews, this one is even better the day after it’s cooked, but it will also benefit from standing for half an hour or so before serving.

finisheddish

Serve with: fresh bread and your best bubbly.

Creïlles amb alls tendres i ou fregit (egg and chips Iaia style)

Egg and chips. Quintessential Shirley-Valentine-English food, right? But wait! Iaia has her own version, which is so highly esteemed, that despite requiring the rapid frying of 30 eggs, it was actually the star of our Christmas Eve family dinner a few years back.

If you can’t find spring garlic, you can always use a couple of normal onions. You will, of course, be cooking a different dish – Patatas a lo Pobre (poor man’s potatoes). They are slightly sweeter than the garlic version but equally delicious.

These tasty totties are not meant to be crunchy, so they can be cooked in advance and reheated while you fry your egg(s) for supper.

What you need for 2:IMG_9888
a bunch of ajos tiernos (spring garlic)
(or 2 medium onions)
2-3 well-sized potatoes
salt
olive oil
an egg (or two) a piece
bread

What you do:
Chop the garlic into 2cm lengths and split the thicker white base in half if it is at all bulbous. Separate the thin green stalky bits as you will add them to the pan a little later to avoid burning.
Pour a generous few glugs of good olive oil into a frying pan and heat gently. Add the white stems of the garlic and fry, stirring to avoid sticking and keeping the heat moderate. You want to soften the vegetables but not add any colour.  After about 5 minutes, add the green stalks and a little salt.  Once the garlic has softened, and the oil has absorbed much of its fragrance, remove and set aside, but be sure to leave as much oil as possible in the pan as you do so.
Peel and roughly chop your potatoes into little bite-sized chunks.  Add a little more oil to the pan if you think you will need it, and heat well.  Pop the potatoes in and fry, moving them about to prevent sticking and promote even cooking.  Salt to taste. It will probably take about 10-12 minutes to cook them through. Once they are done, the garlic goes back in, and everything can be given a quick swirl to mix and mingle before taking off the heat.

Now, I assume I don’t need to tell you how to fry an egg, but I will say that frying requires oil. Without the oil, it is just heating, and I don’t know about you, but “here, have a heated egg with your chips” doesn’t appeal to me at all. We always use olive oil. If you want that lovely, brown, lacey edge on your egg, make sure your oil is hot before you crack!IMG_9892

Serve with: a generous sprinkling of black pepper and, as the oil that will inevitably find its way onto your plate has extremely high oop-value, go for a carb-overload with lovely fresh bread.

Putxero Day 2 – arros al forn (oven-baked rice)

Although this rice uses exactly the same ingredients as yesterday, it has it’s own distinct character because everything dries out a little more in the oven and the flavours intensify.

First off then, pop your oven on to about 180ºC. It needs to be hot by the time you have the rice ready to go in so the stock doesn’t get a chance to go off the boil.

Because we want dry (but not horribly dried out,) rice today, we have to measure the next bit pretty carefully. If you are cooking this in a ceramic or terracotta dish, the stock-to-rice ratio is exactly 2:1. If you use a metal baking dish, you will need a little more stock, and if you cook wholemeal rice, you should increase it to 3:1.  I used one and a half glasses of rice and 3 glasses of stock today. riceandstockIt is also really important to heat your stock to boiling before pouring it over the rice; otherwise, it will all take a good while to start cooking, and things will go all gluggy. Best to get your stock in a pan and on the heat while you deal with the rice and other bits.

Pour your rice into the base of a large, shallow terracotta dish (or a baking tray) and cut however much leftover meat, veg, chickpeas and pork fat you want to decorate your rice with and into bite-sized pieces, slicing the meatball into large rounds. ingredients

Sprinkle them about however you like, but make sure that the meatball slices and the dices of fat are on top – they will brown and melt beautifully and are the bits everyone always fights over.IMG_9784Once you have everything ready, season to taste and pour your boiling stock over the top. Into the oven for 30 or 40 minutes – until the stock has been absorbed by the rice and the top is looking goldenly fabulous.IMG_9789

Serve onto plates or, if you are friendly enough with your dining companion, eat it straight from the dish, following the paella etiquette rules.

Putxero (an unashamedly omnivorous yet thrifty boil-fest) Day 1

January 1st 1993: As a recent arrival to this part of the world, I had kindly been invited to celebrate the new year by eating Putxero – a very traditional, very communal meal – with the family whose apartment I was renting. Unfortunately, I was shockingly hung over, so it will come as no surprise that the sight of a very large, very wobbly lump of boiled pork fat sitting on the table in front of me, waiting to be spooned onto my own plate and then into my mouth had a somewhat adverse effect on my delicate tummy. I was gently (thankfully!) ushered to a nearby sofa and furnished with a pillow, a blanket and a cup of mint tea to recover from the shock.

Of course, Putxero (or Cocido in Castillian) is not just boiled pork fat. It is the Valencian version of the well-known Italian Bollito Misto, or the French Pot au Feu and as such has a great number of other ingredients which, when all boiled together, make the most fantastic stock I have ever tried.  I have become used to the idea of eating a little fat and now fully appreciate the incredible flavour it gives to the other meat and vegetables.  I always take a small piece and smoosh it into the rest of my plateful as though it were butter in a mash.

Oscar’s grandmother cooked putxero every Thursday of the year. Most families will do so once a week or at least every fortnight.  And it is Iaia’s Christmas Day lunch of choice.  Like paella, there are many variations to the ingredients, but unlike paella, these variations occur from house to house, not town to town.  I tend to put a lot more vegetables in than Iaia, and she will now always pop at least a turnip in if she knows I am eating with her.  It is a long, long cook, but you don’t really have to do anything except make sure nothing boils over. This morning I started cooking at 8 a.m., went out for two hours mid-morning, leaving the heat on very low, then came back and finished everything off for lunch at 1:30. This extended cooking time ensures tender meat and a broth which has had time to draw all the rich flavour out of the stock-bones.

The other wonderful thing about putxero is that it provides (at least) three excellent meals for very little money. I will show you all three over the next couple of days.

DAY ONE:

What you need:
MEAT
a piece of garreta (beef calf muscle)meat
several stock bones (pork and beef, include a shin bone with some meat on it)
a piece of broiler chook
a generous piece of pork back fat
a putxero meatball, which is made of:
minced pork
lard
breadcrumbs
cinnamon
egg
salt
parsley
VEGETABLESveges
cardoon
potatoes
swede
carrots
flat beans
sweet potato
(some people add parsnip, but I don’t like it)
OTHER STUFF
chickpeas (soaked overnight)other
salt
rice
water

What you do:
Place the chickpeas, bones, beef, chook and cardoon in a saucepan large enough to hold everything and boil comfortably (mine is a heavy-based, 8-litre, stainless steel beauty). Leave the fat, meatball and veggies until later so they don’t disintegrate. Cover generously with water – I used 3 litres today, but sometimes go up to 5 – and bring to a boil. Skim all rising scum off the surface at least twice until your water boils cleanly, then turn the heat down to a minimum, cover and leave to simmer for three or four hours.
I usually put about a tablespoon of salt in while the bones and meat are boiling, but you can add it after everything is cooked to make sure it isn’t too salty if you prefer.

After about two hours, add the peeled and halved turnip, the fat and the meatball. Then, when there is about an hour to go before lunch, peel your other vegetables and add them. Chop the sweet potato, but leave everything else whole.  Add water if things are poking out and salt to taste. If you have read other posts, you may remember that white rice is not very popular here, so we also add a little orange food colouring at this point. Optional of course!

When you are almost ready for lunch, you need to decant enough stock to cook the first course of rice. For three people, I use about a glass and a half of rice (six of the handfuls you can see in the photo above, plus one for the pot) and roughly three times that of stock. Actually, this recipe is absolutely imprecise and relies wholly on your judgment – remember that the rice ought to be served in broth, not dry.  Add a touch of cinnamon and a little parsley if you have it, and boil away for about 17 minutes, or until cooked. Place in bowls and set on the table to cool slightly while you get the rest of the lunch ready.cooked riceStrain off the rest of the stock for tomorrow and arrange the meat and vegetables on a large platter. platterOnce you’ve eaten the rice, each person serves themselves what they like most. The shot below shows what I chose today (note, no chickpeas – Oscar eats them all!). You should be aware that it is perfectly polite to mash things up a bit, mixing the fat into the potato and getting a good bit of everything into each mouthful. Delicious and fun.single servingOnce you’ve finished eating, store the stock and leftover pieces somewhere cool overnight (in the fridge if it’s summer), separating and discarding the bones and making sure the stock is well-strained.

Serve with: when Oscar was a teenager, he would eat bread with this! Nowadays, we settle for a glass of wine.