Sardinà: salt cured fish with peppers, onions and egg

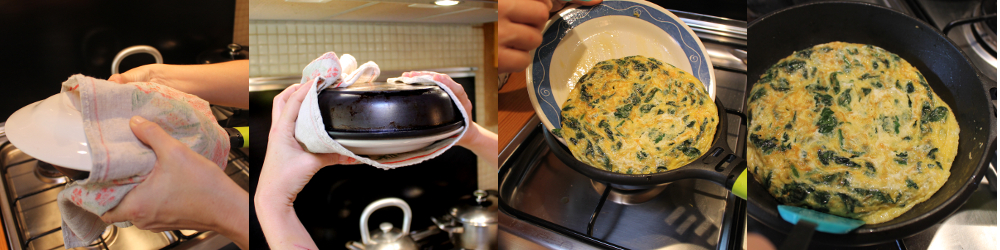
Every year our town has its local “fiesta” at the beginning of September. One of the traditional events is a big sardinà brunch served to whoever turns up by a gang of well-dressed, starboard-leaning ladies.  We prefer to eschew the multitude and have our own small-scale celebration with a few friends instead. This year was a beautiful autumn morning, and Oscar was the most excellent chef.
What you need:ingredients1 salt-cured sardine per person
a few dried “capellà” (trisopterus minutus, or “poor cod”)
1 egg per person
3-4 onions
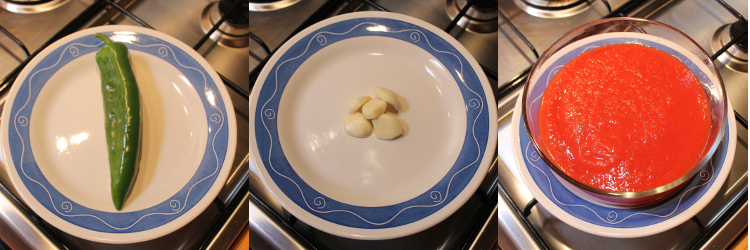
10-12 Italian peppers (green)
1-2 heads of garlic
oil
grapes and bread to serve

What you do:
First of all, get a fire going and let it reduce it to glowing coals. This is for the poor cod, which needs to be lightly charred just before you serve it.  Prep your veg by cutting the peppers into halves or large chunks, separate the individual cloves of garlic but don’t peel them and roughly chop the onions.
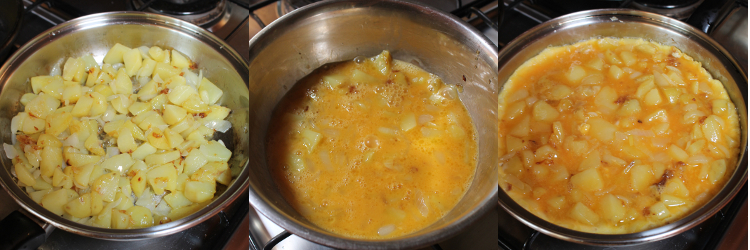
Put a generous slug of oil into a large frying pan (we used a paella pan) and heat. Fry the peppers and garlic until softened and beautifully coloured – this will take a little while, so be patient and keep the beer coming for the cook.cooking
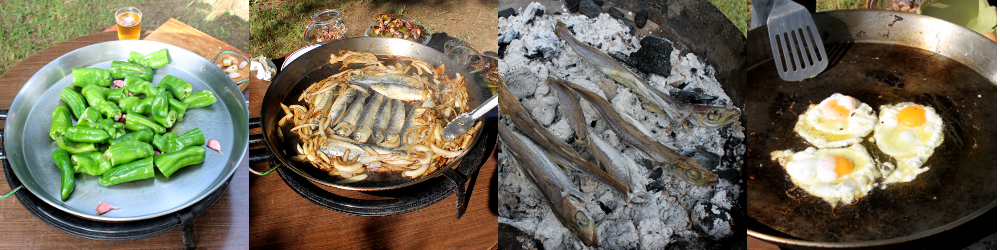
Transfer the peppers and garlic to a large serving plate. In the same oil, you are now going to soften the onion. Again, patience and lots of pushing about with the tongs to avoid bitter burning. Once that’s done, you have to lay the sardines in the pan and give them a few minutes on each side.  Put the sardines and onions onto another serving plate and let your oil heat up to egg-frying pitch. I’m pretty sure you will know how to fry an egg, but I will say that here they like to sort of flick the hot oil over the top of the egg instead of flipping it; the white bubbles and gets slightly crusty, and the flavours that have infused the oil do wonders for the humble huevo.
The poor cod should be put on the coals at about the same time as you fry the eggs – it only needs a minute or two on either side. You might need an extra pair of hands to deal with simultaneous frying and charring.served
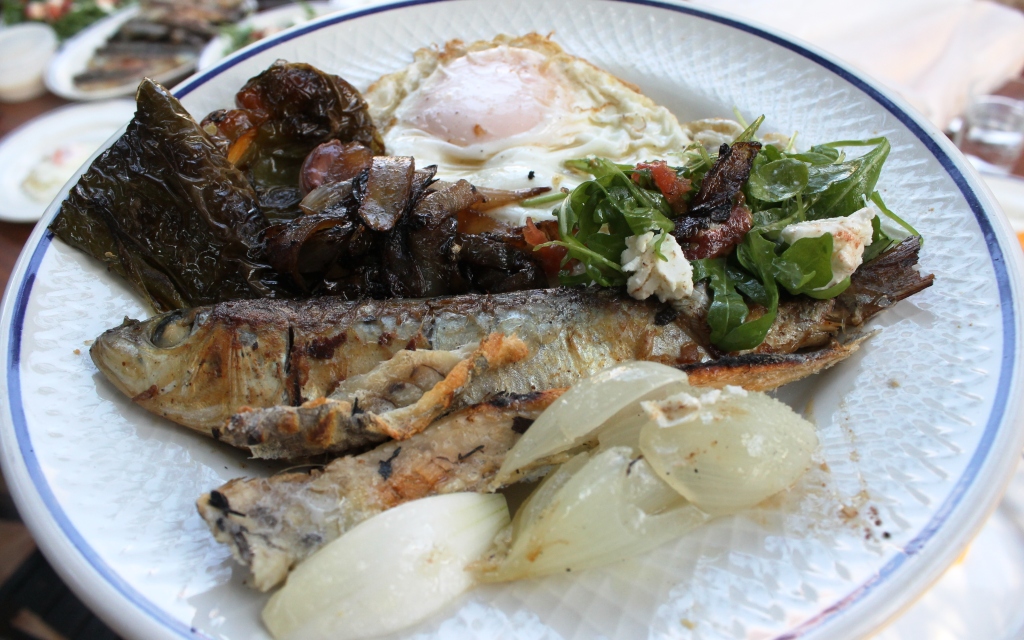
Now all you need to do is fill a plate with a bit of everything and pour some cold beer!

Serve with: grapes (which are at their best in September), bread and beer

Spanish Omelette (aka potato omelette)

Spanish Omelette in Spain means potato omelette, with or without onion. Everyone has their own secrets for making one of the most fantastic omelettes ever, and discussions can get quite heated when it comes to whose is the best! Iaia always uses onion and can turn out a perfect tortilla with her eyes closed. I still need to keep mine open, especially with the flipping.
This dish is incredibly versatile as it can be consumed hot or cold, served as an appetiser, a main meal, a snack, in a roll, on a plate, in bite-sized squares on toothpicks, with tomato, with mayonnaise, with salad, at a picnic, a dinner party, as part of a buffet…need I go on?
The recipe here is for a large dinner-plate-sized omelette which will provide a good slice for 6-8 people. I used a stainless steel frying pan as it’s the only large pan I have, but I highly recommend using a non-stick pan instead.

What you need:ingredients
3 potatoes
1 onion
6 eggs
olive oil
salt
a non-stick frying pan

What you do:
Chop the potato and onion into chunky pieces, as you see above. Heat a generous amount of olive oil so that nothing sticks or burns (you can always drain any excess off before adding the eggs), and gently fry the onions for a minute or two before adding the potatoes. Iaia insists on covering the potatoes as they cook so that their edges become sort of fuzzy instead of sharp. This helps the egg stick to the totties later and gives you a much more attractive finish without any air holes between the potato and egg.process1Beat your eggs in a large bowl and add a good pinch of salt. Once the vegetables are cooked, but not falling to pieces, use a slotted spoon to transfer them to the egg bowl.  Drain any excess oil from the frying pan, but remember you will need a healthy coating to stop any sticking (even in a non-stick pan). Once the pan is well heated again, pour the whole egg and vegetable mix in and move it gently around (without disturbing the edges) so that the omelette cooks evenly, but take care not to turn it into scrambled egg. You can cover a very thick omelette to help with the cooking but don’t walk away!
After a little while, you will have a browned bottom and edge, and curd-like centre. It is time to flip (for photos of this see the Spinach Omelette recipe).  Take your pan off the heat and cover it with a plate. Wrap a tea towel over the top and base of the pan to avoid burning yourself, and grip firmly from either side. Flip with conviction, so the omelette flops out onto your plate in one piece. Put your pan back on the heat and slide your now raw-side-down omelette back into the pan to finish cooking. I like to use a spatula to tuck the edges under a little because it gives a lovely rounded edge; this is especially important if you are cooking a larger omelette.
The trick is now to cook the omelette to the ideal point – neither runny nor rubbery. Practice will show you what it feels like to the touch when it is ready.  Turn out onto a plate and allow to cool (or not!) before eating.finished

Ensaladilla Rusa (a not-altogether-Russian potato salad)

About 10 years ago, a Russian girl called Lana came to stay with someone in the family as part of an exchange programme. My mother-in-law proudly served up a huge batch of Russian Salad to make sure Lana felt at home and was amazed when told that it was about as un-Russian as a salad could get! It seems that our Lana had never eaten at the Hermitage in Moscow circa 1860, where apparently this style of salad was first created by head chef Lucien Olivier. Now Ensaladilla Rusa is a canon of Valencian culinary tradition and another one of those staple nibbles that are plonked on the table before, or during a large family gathering.
It is best eaten the day after prepping and should be served quite cold. Nothing beats homemade mayonnaise, so I am including the (very easy) recipe here. The quantities make enough for 8-10 people to have a good serving-spoon full each, with leftovers.
What you need for the salad:ingredients
1 kg old potatoes (old means less water content)
1/4 kg carrots
1/4 kg French beans
4 hard-boiled eggs
2-3 tins of tuna, drained
50-100g of little gherkins
What you need for the mayonnaise:
1 egg
a pinch of salt
sunflower seed oil
a splash of white wine vinegar

What you do:
Peel and chop your potato into large chunks. All the vegetables need to be boiled but not to total softness – Iaia insists that they need to be al dente so that the whole finished salad doesn’t degenerate into mash.  I put the potatoes into cold water, and once it came to a boil, put the egg timer on for 10 minutes with good results.  As soon as the totties are cooked, drain them and spread them out in a wide, shallow dish to cool completely. Now boil your carrots and beans, refreshing the latter with cold water once cooked so that they stay a nice bright green instead of going a grisly grey. Let all the veg cool right down before continuing.
A lot of people chop their potatoes and carrots into pretty dice, but Iaia says it’s easier to roughly mash, so that is what I do.  You do need to chop the beans, gherkins and eggs into little bits. Mix all of the ingredients together, adding salt to taste and then you are ready to make mayonnaise.
There isn’t any real mystery – you just need a stick blender and a steady hand. Crack the egg into a deep cup, add a pinch of salt and about 1/2 glass of sunflower seed oil (olive is possible, but it makes a very strong-tasting mayo). Start blending, and as soon as you see the mix turning creamy white and thickening, pour a thin, steady stream of oil in as you mix, until you have enough mayonnaise. Add a splash of vinegar to taste at the end, and there it is!mayo
Now you need to spoon your mayonnaise over the salad and mix well until it is evenly gluggy. Iaia uses quite a lot more than I do because I tend to get mayonnaise headaches. Nobody believes me, but it’s true. Pile the salad up into an Uluru shape and spread a thin layer of mayonnaise over the top as if you were icing a cake. Iaia grates a boiled egg yolk over the top to decorate, but I ran out of eggs and so couldn’t. Leave the salad in the fridge until you are ready to eat it. Yum.serving

Serve with: breadsticks

Coca gallega (Galician-style pizza)

A compulsory part of any major meal here is the picaeta, which is a rough equivalent to “nibbles”.  In our family, one of the most appreciated nibble foods (apart from the ubiquitous home-roasted peanuts, olives and crisps), is Auntie Joaquina’s Coca Gallega, a pizza-like pasty which is cut up into squares and devoured almost as soon as it gets to the table.
This recipe is easy, although you should remember to do the basic tomato mix the day before to ensure that it has the right texture and depth of flavour. Feel free to leave out the tuna if you don’t like it, or don’t want to consume the noble fish, and (speaking from experience) it is no great disaster if you forget to add the pine nuts, although they do provide good little nubby bits to bite.
The most complicated part of the recipe is moving the pastry once you have it rolled out, but a rolling pin and a bit of flour solve things admirably.
This recipe gives you quite a bit of pizza. We had four friends staying over for the Easter weekend, and I served it with a big green salad and a plate of Serrano ham for dinner – there was enough left over for morning tea on Sunday.   It’s perfect for taking along to a buffet-style party or picnic!

What you need for the filling:123
1/3 glass of olive oil456beeroil
1 kg of tinned tomato
1 green Italian pepper
1½ spoonfuls of sugar
5-6 cloves of garlic
3 tins of tuna in oil
50g of pine nuts
4 boiled eggs
What you need for the pastry:
1 glass (200ml) sunflower oil
1½ glasses (300ml) beer
a good pinch of salt
plain flour (as much as the liquid admits)

What you do:
It’s best to prepare the tomato base the day before you want to cook the pizza. Heat the olive oil in a large frying pan and gently cook the garlic without letting it burn. Chop the pepper into small pieces and add to the garlic, frying lightly. If your tinned tomatoes are not already pureed, smoosh them up in the blender until they are smooth, then add to the pan. Chuck in the sugar to reduce the acidity of the tommies. You now need to let as much liquid as possible evaporate, while the tomato fries itself tasty.  It took about ¾ of an hour the other day, on a medium flame and with a piece of foil over the top of the pan to stop tomato splatting all over the place.  Once you think the mixture is dry enough, remove it from the heat and leave it in the fridge until tomorrow. tomatoThe following day, drain the tuna of all oil (or brine), chop the eggs into small chunks and add both, together with the pine nuts, to the now cold tomato. Mix well and taste for seasoning. Set aside while you make the pastry and get the oven warm.IMG_1212Heat your oven to 160ºC, preferably with the heat only coming from the bottom. If you can’t choose, then place the pizza down low in the oven to avoid any burning on top.  Pour the beer and oil into a large mixing bowl and add a pinch of salt. Now add flour bit by bit (about half a glass at a time) and mix in with a metal spoon until a dough begins to form.  You are looking for quite a soft, oily dough but one that doesn’t stick to your fingers. When it’s ready, turn it out onto a floured surface and work it lightly – this isn’t bread, so there is no need to knead for any longer than a couple of minutes.  pastryDivide the dough into two parts, one slightly larger for the bottom layer.  Using a flat oven tray (about 60 x 60) lined with baking paper as your guide, and enough flour to stop things from sticking, roll out the bottom layer until it is about 2-3mm thick. Prick with a fork.  Spread your tomato mix over the pastry, exactly as you would a pizza.  Use it all.
Now roll out your lid; it should be a little thinner than the bottom. Transferring it to the pizza can be tricky, but if you lightly flour the surface of the pastry and your rolling pin, you should be able to carefully roll the flat dough up onto the pin and then unravel it over your tomato.
Use a fork to press the edges together and prick the top surface. Brush with a beaten egg and pop it into the oven for about 40 minutes, checking from time to time. UntfinisheditledIf you find the base is cooked, but the top is still very pale, you can switch to the grill only, keeping your eye on the pizza to make sure it doesn’t get frazzled. Allow to cool completely before serving (it’s even better the next day!)serving

Serve with: other nibbles, or a salad and some cured meats for a main meal.

Creïlles amb alls tendres i ou fregit (egg and chips Iaia style)

Egg and chips. Quintessential Shirley-Valentine-English food, right? But wait! Iaia has her own version, which is so highly esteemed, that despite requiring the rapid frying of 30 eggs, it was actually the star of our Christmas Eve family dinner a few years back.

If you can’t find spring garlic, you can always use a couple of normal onions. You will, of course, be cooking a different dish – Patatas a lo Pobre (poor man’s potatoes). They are slightly sweeter than the garlic version but equally delicious.

These tasty totties are not meant to be crunchy, so they can be cooked in advance and reheated while you fry your egg(s) for supper.

What you need for 2:IMG_9888
a bunch of ajos tiernos (spring garlic)
(or 2 medium onions)
2-3 well-sized potatoes
salt
olive oil
an egg (or two) a piece
bread

What you do:
Chop the garlic into 2cm lengths and split the thicker white base in half if it is at all bulbous. Separate the thin green stalky bits as you will add them to the pan a little later to avoid burning.
Pour a generous few glugs of good olive oil into a frying pan and heat gently. Add the white stems of the garlic and fry, stirring to avoid sticking and keeping the heat moderate. You want to soften the vegetables but not add any colour.  After about 5 minutes, add the green stalks and a little salt.  Once the garlic has softened, and the oil has absorbed much of its fragrance, remove and set aside, but be sure to leave as much oil as possible in the pan as you do so.
Peel and roughly chop your potatoes into little bite-sized chunks.  Add a little more oil to the pan if you think you will need it, and heat well.  Pop the potatoes in and fry, moving them about to prevent sticking and promote even cooking.  Salt to taste. It will probably take about 10-12 minutes to cook them through. Once they are done, the garlic goes back in, and everything can be given a quick swirl to mix and mingle before taking off the heat.

Now, I assume I don’t need to tell you how to fry an egg, but I will say that frying requires oil. Without the oil, it is just heating, and I don’t know about you, but “here, have a heated egg with your chips” doesn’t appeal to me at all. We always use olive oil. If you want that lovely, brown, lacey edge on your egg, make sure your oil is hot before you crack!IMG_9892

Serve with: a generous sprinkling of black pepper and, as the oil that will inevitably find its way onto your plate has extremely high oop-value, go for a carb-overload with lovely fresh bread.

Putxero Day 3 – mandonguilles (left-over croquettes)

Here is the final recipe for this particular putxero.  Using the rest of your leftovers, plus a couple of extras, you can make a whole meal of these little golden dumplings.
This particular recipe is hotly debated in the family. Should you add bechamel? Should you use a blender instead of a mortar and pestle, to make the ingredients smooth?  If I were to follow Iaia to the letter, I would answer yes to both of those questions, but Auntie Toni has convinced me that la abuela (Oscar’s grandmother) didn’t do either and that her mandonguilles were the best ever…I’ll let you experiment and decide for yourself!

What you need:ingredients leftovers from the putxero
1 onion
1 clove of garlic
a small bunch of parsley
about 30g of pine nuts
1 or 2 eggs
1/2 tsp sweet paprika
sunflower seed oil for frying

What you do: Finely dice your onion and fry gently in a little olive oil until it softens. While it is cooking, grab a mortar and pestle and smoosh your garlic and parsley, adding a pinch of salt to help grind everything up.  Once the onion is softened, stir in the garlic/parsley mix and the tsp of paprika. Fry for 20 to 30 seconds, then remove from the heat.
Take your leftovers and mortar and pestle them in manageable batches. (I don’t include the fat at this stage because I prefer to finely chop it rather than squash it). You want things to be chunky but not whole; it isn’t very taxing, nor is it a precise art, so smoosh to please yourself.  In a large bowl, mix the onion, garlic and parsley into the mashed putxero leftovers. Add the finely chopped fat and the pine nuts. Mix well.
Put a frying pan with a couple of centimetres of sunflower oil on to heat. The hotter the oil, the less oily your finished croquettes will be.  The egg (which is essential for binding the croquettes) can be dealt with in two ways, I tried both today, and it makes no difference whatsoever.
1. Beat an egg and then stir into the mixture before forming little croquette-shaped balls and frying, or
2. Make the little balls first and then dip them into a beaten egg before popping them into the pan.
Let the croquettes turn golden on one side before attempting to move them, and then do so gingerly so that they don’t fall apart. Drain on kitchen paper and allow to cool slightly before gobbling them up, or you will burn your mouth! Easy peasy.IMG_9813

Potage (thick vegetable and chickpea soup)

One of Iaia’s great winter staples, this thick vegetable soup can take just about anything you throw at it. She often puts small pieces of diced Serrano ham, or whichever vegetable looks good at the greengrocers.  You can use vegetable stock for a vegetarian soup, but I happened to have chicken stock in the freezer so this recipe was made with that.

Chickpeas are somewhat contentious in our household. Oscar loves them but I am a little less enamoured and tend to add far fewer than he would like (occasionally omitting them altogether, by accident, of course). However, they really do make this soup properly filling and really satisfying.  We buy dried chickpeas and soak them overnight in a heap of water before adding them to any slow-cooked stew or soup for a full couple of hours at least. If you are using the canned version, pop them in at the same time as the haricot beans to heat through and absorb some of the flavours. As with most stew-like dishes, this one improves after sitting quietly overnight.

ingredients

What you need for four people:
1 large onion
3 cloves of garlic
2 large (3 small) pear tomatoes
2 carrots
1 stick of cardoon if you can find it
4 medium young artichokes
250g chickpeas (pre-soak if dried)
1 small jar of white haricot beans
600ml or so of good stock
2 hard boiled eggs
salt
olive oil

IMG_9694

What you do:
I prefer to do all the washing, chopping and grating before turning any heat on as it saves me the frustration of watching my base veggies burn because I can’t peel or chop something quickly enough (and yes, I learnt this the hard way). So, finely chop your onion and garlic, then chop the carrot and cardoon into smallish pieces and wash your spinach thoroughly. Now grate the tomatoes, discarding the skin, and last of all, peel the tough outer leaves off the artichokes, slice off the base and the leaf tips so that only tender pale artichoke, which you will cut into eighths, remains.
When everything is ready, put a generous tablespoon of good olive oil into a large, heavy-based saucepan and gently fry the onion and garlic. Once they have softened, add the tomato and stir for a couple of minutes so that it gets a bit of a fry, too – this brings out a deeper flavour than just letting it boil along with everything else.  In go the carrots, cardoon and artichoke with a stir. If you are using pre-soaked chickpeas, pop them in now too.
The amount of stock you use will depend on how large your vegetables are. I used about 600ml for this particular potage. The idea is to just cover everything so that you end up with a really thick broth.  Once you have put the liquid in, you can add some salt to taste and then you have to turn everything down to the lowest heat possible and let it simmer very gently for at least 2 hours. Iaia says, “fes-ho poquet a poquet” which means “do it little by little”.
Towards the end of the cooking time, add the spinach, beans and canned chickpeas, which will be happiest (and tastiest) with about 20 minutes of gentle simmering.  Just before serving, roughly chop your two boiled eggs and let them sink into what should be a very good-looking pan of potage.
Serve with: bread and red

Iaia’s apple cake

I have always preferred to bake cakes with butter, very much in the English way. Yet it is not very common to see butter in Iaia’s fridge at all and she prefers to fatten her batter with sunflower seed oil, claiming that it has a lighter flavour and therefore does not interfere with the other ingredients so much. It certainly gives cakes a lighter texture, and all of the cake recipes here are really very good, even to my butter-loving taste buds. But, if you think butter is better, by all means, substitute.

Iaia always gives me measurements in glass or yoghurt-pot fulls, which is fine as long as you use the same size glass or pot for everything to maintain the right proportions. For this recipe, I have included her words plus a translation into ml and g.

What you need:ingredients
a generous half glass (150ml) of sunflower seed oil and the same amount of milk
a glass minus a finger (160g) of sugar
a glass and ¾ (250g) plain flour
4 eggs, separated
a sachet and a half (25g) of baking powder
a bit (half a tsp) of cinnamon
one large, or two small golden delicious apples

What you do:
Pop the oven on to 180ºC and line a 27cm spring-form cake pan.  Beat your egg yolks and sugar together, then mix in the cinnamon. Add the milk and oil and beat well. Sift in the flour and baking powder, adding a little at a time and stirring until well mixed.  Whisk the egg chopped applewhites into soft peaks and fold carefully into the cake batter.  Peel and quarter your apples and slice thinly so that the pieces will cook well.  Pour the batter into your tin and arrange the apple slices on top. Iaia always does this in artful circles, but I was feeling slightly abstract this evening. You could also chop little apple dice and mix them into the batter for more appley-ness.
Sprinkle a little extra sugar over the apple and cook the cake for around 45-50 minutes (NB: Iaia uses a much wider, shallower tin and cooks her cake for just 30 minutes, but I don’t have one, so it takes longer). When you notice that the top is golden and you start to smell an appley, cakey, cinnamony yumminess wafting about the place, check with a skewer to ensure it is cooked all the way through.

As this cake is better when fully cooled, leave it in the tin for a good while, then carefully un-spring the base and dig in.IMG_9677

Spinach omelette

Oscar and I work in the evenings and often don’t get home before 10 pm during the week. With only a bit of fruit between lunch and then, dinner is always a bit of a desperate affair, often involving bits of cheese, salami, avocado…in short, anything that doesn’t require cooking and can be shoved quickly into a roll or forked hastily into a hungry mouth.
Pre-cooking an omelette and leaving it to cool while we are at work means that we have something more substantial to accompany our bread, and one of our favourites is Iaia’s IMG_9399spinach omelette, to which she usually adds ajos tiernos (spring-garlic). As I find the ajos a little strong for late evening supper, I prefer to use a small clove of normal garlic to flavour the gorgeously convoluted dark green leaves. I know this recipe is simple, but it is one of Iaia’s staples, so it really can’t be left out!

What you need:ingredients
3 eggs
a small bunch of spinach
a clove of garlic
salt, nutmeg
olive oil

What you do:
Wash your spinach carefully and chop it roughly. Wilt in a non-stick frying pan – the water from washing will be enough, no need to add any – then leave to drain in a colander while you get the eggs and garlic ready.  I like to microplane my garlic rather than slice it, but if you prefer little slivers, by all means, slice away.  Once peeled and prepped, gently fry your garlic in about a tbsp of olive oil; make sure you don’t burn it, or it will be horribly bitter.
Add the cooked spinach and continue to fry until there is hardly any wateriness left.frying Remove from the heat. Beat your three eggs in a medium-sized bowl, adding salt and a little nutmeg or any other seasoning you fancy. Put your spinach into the same egg bowl and stir until thoroughly mixed.
Get your pan good and hot, and coat it with a little oil. Pour your egg and spinach mix in. If the mix is very deep in the pan (ie. you have a small pan), you will need to gently push it around (without disturbing the edges) so that the omelette cooks evenly, but take care not to turn it into scrambled egg. preflipAfter a few minutes, you will have a browned bottom and edge with a curd-like centre. It is time to flip.  Take your pan off the heat and cover it with a plate. Wrap a tea towel over the top and base of the pan to avoid burning yourself, and grip firmly from either side. Flip everything over with conviction so that the omelette flops out onto your plate in one piece. Put your pan back on the heat and slide your now raw-side-down omelette back into the pan to finish cooking. I like to use a spatula to tuck the edges under a little because it gives a lovely rounded finish, which is especially important if you are cooking a larger omelette. flippingHeat off. Omelette out. Eat hot, or leave to cool for a delicious roll filling.

IMG_9395